Zookeeper 启动流程分析
本章将对Zookeeper项目中的启动流程进行分析。
Zookeeper 启动概述(QuorumPeerMain分析)
在Zookeeper项目中启动Zookeeper服务需要使用到zkServer.sh或者zkServer.cmd文件,前者用于在Linux环境进行后者是用于Windows环境,由于zkServer.sh文件内容太多下面将使用zkServer.cmd文件进行启动流程说明,文件zkServer.cmd中内容如下。
setlocal
call "%~dp0zkEnv.cmd"

set ZOOMAIN=org.apache.zookeeper.server.quorum.QuorumPeerMain
set ZOO_LOG_FILE=zookeeper-%USERNAME%-server-%COMPUTERNAME%.log

echo on
call %JAVA% "-Dzookeeper.log.dir=%ZOO_LOG_DIR%" "-Dzookeeper.root.logger=%ZOO_LOG4J_PROP%" "-Dzookeeper.log.file=%ZOO_LOG_FILE%" "-XX:+HeapDumpOnOutOfMemoryError" "-XX:OnOutOfMemoryError=cmd /c taskkill /pid %%%%p /t /f" -cp "%CLASSPATH%" %ZOOMAIN% "%ZOOCFG%" %*

endlocal
在上述代码中核心可以看到它是需要执行一个java命令,在这个命令中最关键的是QuorumPeerMain类。下面对QuorumPeerMain类进行分析,由于QuorumPeerMain类是通过命令行启动的,因此需要重点关注main方法,具体处理代码如下。
public static void main(String[] args) {
    QuorumPeerMain main = new QuorumPeerMain();
    try {
        main.initializeAndRun(args);
    } catch (IllegalArgumentException e) {
        LOG.error("Invalid arguments, exiting abnormally", e);
        LOG.info(USAGE);
        System.err.println(USAGE);
        System.exit(2);
    } catch (ConfigException e) {
        LOG.error("Invalid config, exiting abnormally", e);
        System.err.println("Invalid config, exiting abnormally");
        System.exit(2);
    } catch (DatadirException e) {
        LOG.error("Unable to access datadir, exiting abnormally", e);
        System.err.println("Unable to access datadir, exiting abnormally");
        System.exit(3);
    } catch (AdminServerException e) {
        LOG.error("Unable to start AdminServer, exiting abnormally", e);
        System.err.println("Unable to start AdminServer, exiting abnormally");
        System.exit(4);
    } catch (Exception e) {
        LOG.error("Unexpected exception, exiting abnormally", e);
        System.exit(1);
    }
    LOG.info("Exiting normally");
    System.exit(0);
}
在上述代码中首先会构造QuorumPeerMain对象,然后调用initializeAndRun方法完成启动,关于方法initializeAndRun的处理代码如下。
在上述代码中核心是调用initializeAndRun方法进行启动,具体处理代码如下。
protected void initializeAndRun(String[] args)
  throws ConfigException, IOException, AdminServerException {
  QuorumPeerConfig config = new QuorumPeerConfig();
  if (args.length == 1) {
    config.parse(args[0]);
  }


  // 数据目录清理器
  DatadirCleanupManager purgeMgr = new DatadirCleanupManager(config.getDataDir(),
                                                             config.getDataLogDir(),
                                                             config.getSnapRetainCount(),
                                                             config.getPurgeInterval());
  // 启动数据目录清理管理器
  purgeMgr.start();

  if (args.length == 1 && config.isDistributed()) {
    // 从配置中启动
    runFromConfig(config);
  }
  else {
    LOG.warn("Either no config or no quorum defined in config, running "
             + " in standalone mode");
    ZooKeeperServerMain.main(args);
  }
}
在上述代码中核心处理流程如下。
- 从启动命令参数中将第一个参数转换为QuorumPeerConfig对象。
- 创建数据目录清理器(DatadirCleanupManager)将其启动。
- 如果启动命令参数长度为1,并且配置中明确指出是分布式的就执行runFromConfig方法启动,反之则使用ZooKeeperServerMain.main方法启动。
接下来对runFromConfig方法进行分析,在该方法中会完成成员变量quorumPeer的初始化,这个成员变量可以理解为参选节点,该成员变量在后续选举处理流程中很重要,在初始化成员变量quorumPeer是所需要使用到的参数大部分都从配置类(QuorumPeerConfig)中来,也有部分实时创建,最重要的是创建完成后执行的方法,具体代码如下。
quorumPeer.initialize();
quorumPeer.start();
通过对initializeAndRun方法和runFromConfig方法的分析可以发现在整个处理流程中还会涉及DatadirCleanupManager和QuorumPeer(在选举分析时做相关分析,本章暂不做分析)。
DatadirCleanupManager 分析
本节将对DatadirCleanupManager类进行分析,该类是用于清理文件的类,清理文件包括事务日志以及快照文件,在该类中存在的成员变量信息见表。
| 变量名称 | 变量类型 | 变量说明 |
|---|---|---|
| snapDir | File | 快照目录 |
| dataLogDir | File | 数据日志目录 |
| snapRetainCount | int | 快照保留数量 |
| purgeInterval | int | 清理间隔周期 |
| purgeTaskStatus | PurgeTaskStatus | 清理状态,存在三种<br />1. NOT_STARTED:未开始<br />2. STARTED:以开始<br />3. COMPLETED:处理完成 |
| timer | Timer | 定时器 |
了解成员变量后对启动方法(start方法)进行分析,具体处理代码如下。
public void start() {
  // 状态是以开始不做操作
  if (PurgeTaskStatus.STARTED == purgeTaskStatus) {
    LOG.warn("Purge task is already running.");
    return;
  }
  // 清理间隔小于等于0不做操作
  if (purgeInterval <= 0) {
    LOG.info("Purge task is not scheduled.");
    return;
  }

  // 创建定时器
  timer = new Timer("PurgeTask", true);
  // 创建定时任务
  TimerTask task = new PurgeTask(dataLogDir, snapDir, snapRetainCount);
  // 启动定时任务
  timer.scheduleAtFixedRate(task, 0, TimeUnit.HOURS.toMillis(purgeInterval));

  // 状态设置为以开始
  purgeTaskStatus = PurgeTaskStatus.STARTED;
}
在上述代码中核心处理流程如下。
- 判断成员变量purgeTaskStatus是否是STARTED,如果是则不做处理。
- 判断成员变量purgeInterval是否小于0,如果是则不做处理。
- 创建定时器向定时器中放入定时任务PurgeTask并启动任务。
- 设置成员变量purgeTaskStatus为STARTED。
根据上述处理流程分析可以发现最关键的是PurgeTask对象,它是完成整个文件清理的核心,核心执行代码如下。
@Override
public void run() {
  LOG.info("Purge task started.");
  try {
    PurgeTxnLog.purge(logsDir, snapsDir, snapRetainCount);
  } catch (Exception e) {
    LOG.error("Error occurred while purging.", e);
  }
  LOG.info("Purge task completed.");
}
在这段代码将处理流程委托给PurgeTxnLog.purge方法,其中所需三个参数。
- 参数logsDir:数据日志目录
- 参数snapsDir:快照日志目录
- 参数snapRetainCount:保留数量
了解执行参数后对purge方法进行分析,具体处理代码如下。
public static void purge(File dataDir, File snapDir, int num) throws IOException {
  // 快照保留数量小于3抛出异常
  if (num < 3) {
    throw new IllegalArgumentException(COUNT_ERR_MSG);
  }

  // 创建FileTxnSnapLog对象
  FileTxnSnapLog txnLog = new FileTxnSnapLog(dataDir, snapDir);

  // 从FileTxnSnapLog对象中获取一定数量的文件
  List<File> snaps = txnLog.findNRecentSnapshots(num);
  // 获取寻找的文件数量
  int numSnaps = snaps.size();
  // 如果文件数量大于0
  if (numSnaps > 0) {
    // 清理快照
    purgeOlderSnapshots(txnLog, snaps.get(numSnaps - 1));
  }
}
上述代码核心处理流程如下。
- 判断保留的文件数量是否小于3,如果是则需要抛出异常。
- 创建FileTxnSnapLog对象,然后从中寻找一定数量的快照文件。寻找方式是先对文件进行排序,然后获取最小的num个文件,即zxid最小的num个文件。
- 如果第(2)步中寻找的文件数量大于0则进行清理操作。
在上述处理流程中最关键的是purgeOlderSnapshots方法,具体处理代码如下。
static void purgeOlderSnapshots(FileTxnSnapLog txnLog, File snapShot) {
  // 从快照文件的名字中提取zxid
  final long leastZxidToBeRetain = Util.getZxidFromName(
    snapShot.getName(), PREFIX_SNAPSHOT);

  // 在参数txnLog提取zxid在leastZxidToBeRetain之前的数据
  final Set<File> retainedTxnLogs = new HashSet<File>();
  retainedTxnLogs.addAll(Arrays.asList(txnLog.getSnapshotLogs(leastZxidToBeRetain)));

  // 文件过滤器
  class MyFileFilter implements FileFilter {
    private final String prefix;

    MyFileFilter(String prefix) {
      this.prefix = prefix;
    }

    public boolean accept(File f) {
      if (!f.getName().startsWith(prefix + "."))
        return false;
      if (retainedTxnLogs.contains(f)) {
        return false;
      }
      // 当前文件的zxid
      long fZxid = Util.getZxidFromName(f.getName(), prefix);
      // 文件的zxid大于等于最小值不需要删除
      if (fZxid >= leastZxidToBeRetain) {
        return false;
      }
      return true;
    }
  }
  // 过滤数据文件
  File[] logs = txnLog.getDataDir().listFiles(new MyFileFilter(PREFIX_LOG));
  List<File> files = new ArrayList<>();
  if (logs != null) {
    files.addAll(Arrays.asList(logs));
  }

  // 过滤快照文件
  File[] snapshots = txnLog.getSnapDir().listFiles(new MyFileFilter(PREFIX_SNAPSHOT));
  if (snapshots != null) {
    files.addAll(Arrays.asList(snapshots));
  }

  // 删除历史文件
  for (File f : files) {
    final String msg = "Removing file: " +
      DateFormat.getDateTimeInstance().format(f.lastModified()) +
      "\t" + f.getPath();
    LOG.info(msg);
    System.out.println(msg);
    if (!f.delete()) {
      System.err.println("Failed to remove " + f.getPath());
    }
  }

}
在上述代码中核心处理流程如下。
- 从快照文件中获取zxid,记做leastZxidToBeRetain变量。
- 从参数txnLog中提取文件名zxid在leastZxidToBeRetain之前的文件放入到retainedTxnLogs集合中。
- 创建文件过滤器,该文件过滤器主要用于比较zxid,具体比较细节如下。
- 文件不是以"log."或者"snapshot."开头的不过滤
- 文件不在retainedTxnLogs集合中不过滤。
- 文件zxid大于等于leastZxidToBeRetain不过滤。
- 从参数txnLog中根据第(3)步创建的文件过滤器获取数据文件和快照文件,然后将其进行删除操作。
ZooKeeperServerMain 启动分析
在Zookeeper项目中可以使用ZooKeeperServerMain来启动zk服务,开发者可以通过main方法来完成Zookeeper服务端的启动,在main方法中最关键的代码如下。
ZooKeeperServerMain main = new ZooKeeperServerMain();
main.initializeAndRun(args);
在上述代码中第一行属于直接构造对象操作细节不多,重点是initializeAndRun方法的执行,详细代码如下。
protected void initializeAndRun(String[] args)
  throws ConfigException, IOException, AdminServerException {
  try {
    // 注册log4j与MBeanServer相关信息
    ManagedUtil.registerLog4jMBeans();
  } catch (JMException e) {
    LOG.warn("Unable to register log4j JMX control", e);
  }

  // 创建Zookeeper服务端配置
  ServerConfig config = new ServerConfig();
  // 解析配置
  if (args.length == 1) {
    config.parse(args[0]);
  } else {
    config.parse(args);
  }

  // 核心运行方法
  runFromConfig(config);
}
在上述代码中核心处理流程如下。
- 创建Zookeeper服务端配置,并调用parse方法对命令行参数进行解析。
- 通过run FromConfig方法和Zookeeper服务端配置启动Zookeeper。
接下来对服务端配置解析过程进行分析,具体处理代码如下
public void parse(String path) throws ConfigException {
  // 创建Zookeeper配置类(仲裁配置类)
  QuorumPeerConfig config = new QuorumPeerConfig();
  // 解析配置地址
  config.parse(path);

  // 读取配置并且将其设置到成员变量
  readFrom(config);
}
在上述代码中进行配置解析会交给QuorumPeerConfig类完成,具体解析过程是将文件路径转换为文件对象,然后通过Properties类将文件中的内容进行加载,加载后的数据信息会存储在QuorumPeerConfig类中。完成QuorumPeerConfig#parse方法调用后会进行readFrom方法的处理,该方法是将QuorumPeerConfig类中保存的配置进行提取,提取到ServerConfig类中,提取完成后ServerConfig#parse方法执行结束。
接下来对runFromConfig方法进行分析,该方法的目标是完成Zookeeper服务的而启动,具体处理代码如下。
public void runFromConfig(ServerConfig config)
  throws IOException, AdminServerException {
  LOG.info("Starting server");
  // 事务日志和快照日志
  FileTxnSnapLog txnLog = null;
  try {
    txnLog = new FileTxnSnapLog(config.dataLogDir, config.dataDir);
    // 创建ZooKeeperServer类
    final ZooKeeperServer zkServer = new ZooKeeperServer(txnLog,
                                                         config.tickTime, config.minSessionTimeout, config.maxSessionTimeout, null,
                                                         QuorumPeerConfig.isReconfigEnabled());
    txnLog.setServerStats(zkServer.serverStats());

    final CountDownLatch shutdownLatch = new CountDownLatch(1);
    zkServer.registerServerShutdownHandler(
      new ZooKeeperServerShutdownHandler(shutdownLatch));

    adminServer = AdminServerFactory.createAdminServer();
    adminServer.setZooKeeperServer(zkServer);
    // 启动管理端
    adminServer.start();

    // 是否需要启动Zookeeper服务标记位,默认值为真
    boolean needStartZKServer = true;
    // 客户端地址不为空
    if (config.getClientPortAddress() != null) {
      // 创建ServerCnxnFactory
      cnxnFactory = ServerCnxnFactory.createFactory();
      // 设置配置信息
      cnxnFactory.configure(config.getClientPortAddress(), config.getMaxClientCnxns(),
                            false);
      // 启动
      cnxnFactory.startup(zkServer);
      // 是否需要启动Zookeeper服务标记位设置为false
      needStartZKServer = false;
    }
    // 安全客户端地址不为空
    if (config.getSecureClientPortAddress() != null) {
      // 创建ServerCnxnFactory
      secureCnxnFactory = ServerCnxnFactory.createFactory();
      // 设置配置信息
      secureCnxnFactory.configure(config.getSecureClientPortAddress(),
                                  config.getMaxClientCnxns(), true);
      // 启动
      secureCnxnFactory.startup(zkServer, needStartZKServer);
    }

    // 创建容器管理器
    containerManager =
      new ContainerManager(zkServer.getZKDatabase(), zkServer.firstProcessor,
                           Integer.getInteger("znode.container.checkIntervalMs",
                                              (int) TimeUnit.MINUTES.toMillis(1)),
                           Integer.getInteger("znode.container.maxPerMinute", 10000)
                          );
    // 容器管理器启动
    containerManager.start();

    shutdownLatch.await();

    // 关闭
    shutdown();


    if (cnxnFactory != null) {
      cnxnFactory.join();
    }
    if (secureCnxnFactory != null) {
      secureCnxnFactory.join();
    }
    if (zkServer.canShutdown()) {
      zkServer.shutdown(true);
    }
  } catch (InterruptedException e) {
    // warn, but generally this is ok
    LOG.warn("Server interrupted", e);
  } finally {
    if (txnLog != null) {
      // 关闭事务日志
      txnLog.close();
    }
  }
}
在上述代码中核心处理流程如下。
- 创建FileTxnSnapLog对象,FileTxnSnapLog对象核心用于存储事务日志(TxnLog)和快照日志(SnapShot)。
- 创建ZooKeeperServer对象。
- 向FileTxnSnapLog对象中设置ZooKeeperServer对象的状态信息。
- 创建CountDownLatch对象,并且向ZooKeeperServer对象中注册关闭处理器(ZooKeeperServerShutdownHandler),关闭处理器需要依赖CountDownLatch对象。
- 创建AdminServer对象并设置ZooKeeperServer对象,在设置完成后执行AdminServer#start方法启动AdminServer。
- 创建是否需要启动Zookeeper服务标记位,默认值为真,如果配置中客户端地址不为空将会调整数据信息为假。此外还需要创建ServerCnxnFactory对象并且配置相关信息然后将其启动。
- 如果配置中安全客户端地址不为空将会创建ServerCnxnFactory对象并配置相关信息然后启动。
- 创建容器管理器(ContainerManager)并将其启动。
- 等待通知进行关闭相关操作,通知来源由ZooKeeperServerShutdownHandler类提供,关闭内容包含如下内容。
- 容器管理器(ContainerManager)
- 两个ServerCnxnFactory,分别是第(6)、(7)步中的内容。
- 管理服务AdminServer。
- 如果cnxnFactory和secureCnxnFactory不为空则进行join方法调度。
- 判断zk服务是否可以进行关闭操作,如果可以则进行关闭操作。
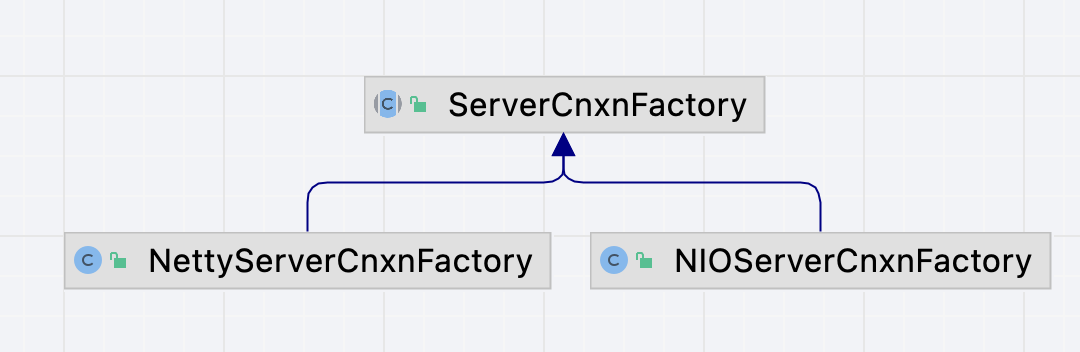
ServerCnxnFactory 分析
本节将对ServerCnxnFactory类进行分析,在Zookeeper项目中该类具备两个实现类。
- 实现类NettyServerCnxnFactory,它是基于netty项目进行实现。
- 实现类NIOServerCnxnFactory,它是基于JDK中的NIO原生实现。
ServerCnxnFactory类与实现类的类图如图所示。
了解实现类后还需要了解成员变量,具体信息见表。
| 变量名称 | 变量类型 | 变量说明 |
|---|---|---|
| closeConn | ByteBuffer | 用于判断是否是关闭连接的字节缓存。 |
| cnxns | Set<ServerCnxn> | 服务器链接集合 |
| connectionBeans | ConcurrentHashMap<ServerCnxn, ConnectionBean> | 服务器链接和客户端连接之间的映射关系 |
| login | Login | 登陆信息 |
| secure | boolean | 是否启用ssl |
| saslServerCallbackHandler | SaslServerCallbackHandler | Sasl 服务器回调处理程序 |
| zkServer | ZooKeeperServer | zk服务 |
了解成员变量后下面对ServerCnxnFac tory类中定义的各个方法进行概要说明。
- 方法createFactory用于创建ServerCnxnFactory类的实现类。
- 方法getLocalPort用于获取本地端口。
- 方法getConnections用于获取服务连接集合。
- 方法getNumAliveConnections用于获取活跃(存活)的服务连接数量。
- 方法closeSession用于关闭会话。
- 方法configure用于配置ServerCnxnFactory类中的数据。
- 方法reconfigure用于重载配置。
- 方法getMaxClientCnxnsPerHost用于获取特定主机 (ip) 允许的最大连接数。
- 方法setMaxClientCnxnsPerHost用于设置特定主机 (ip) 允许的最大连接数。
- 方法startup和start都为启动阶段进行服务。
- 方法shutdown用于关闭各项信息,不同实现类关闭的内容不同。
- 方法closeAll用于关闭所有服务连接。
- 方法getLocalAddress用于获取本地网络地址。
- 方法resetAllConnectionStats用于重置所有服务连接统计信息。
- 方法getAllConnectionInfo用于获取所有服务连接信息.
- 方法unregisterConnection用于取消服务连接注册。
- 方法registerConnection用于注册服务连接。
- 方法configureSaslLogin用于配置Sasl登陆信息。
下面对ServerCnxnFactory类中的已经实现过的方法进行说明,首先是createFactory方法,具体处理代码如下。
static public ServerCnxnFactory createFactory() throws IOException {
  // zookeeper 服务连接工厂类名
  String serverCnxnFactoryName =
    System.getProperty(ZOOKEEPER_SERVER_CNXN_FACTORY);
  // 类名为空采用NIOServerCnxnFactory类名
  if (serverCnxnFactoryName == null) {
    serverCnxnFactoryName = NIOServerCnxnFactory.class.getName();
  }
  try {
    // 反射创建类
    ServerCnxnFactory serverCnxnFactory =
      (ServerCnxnFactory) Class.forName(serverCnxnFactoryName)
      .getDeclaredConstructor().newInstance();
    LOG.info("Using {} as server connection factory", serverCnxnFactoryName);
    return serverCnxnFactory;
  } catch (Exception e) {
    IOException ioe = new IOException("Couldn't instantiate "
                                      + serverCnxnFactoryName);
    ioe.initCause(e);
    throw ioe;
  }
}
在上述代码中核心处理流程如下。
- 在环境变量中获取服务连接工厂类名,环境变量是zookeeper.serverCnxnFactory。
- 如果工厂类名为空则会采用NIOServerCnxnFactory类的类名。
- 通过反射创建ServerCnxnFactory类,并将其返回。
接下来对注册服务连接 方法registerConnection进行分析,具体处理代码如下。
public void registerConnection(ServerCnxn serverCnxn) {
  // zk服务不为空
  if (zkServer != null) {
    // 创建连接存储对象
    ConnectionBean jmxConnectionBean = new ConnectionBean(serverCnxn, zkServer);
    try {
      // 注册实例
      MBeanRegistry.getInstance().register(jmxConnectionBean, zkServer.jmxServerBean);
      // 添加到容器
      connectionBeans.put(serverCnxn, jmxConnectionBean);
    } catch (JMException e) {
      LOG.warn("Could not register connection", e);
    }
  }

}
在上述代码中核心处理流程如下。
- 判断zk服务是否为空,如果为空则不做处理。
- 创建连接对象和zk服务的存储对象。
- 通过MBeanRegistry类进行注册操作。
- 将数据添加到connectionBeans容器中。
接下来对取消注册服务连接方法unregisterConnection进行分析,具体处理代码如下。
public void unregisterConnection(ServerCnxn serverCnxn) {
  ConnectionBean jmxConnectionBean = connectionBeans.remove(serverCnxn);
  if (jmxConnectionBean != null) {
    MBeanRegistry.getInstance().unregister(jmxConnectionBean);
  }
}
在上述代码中核心处理流程如下。
- 在容器connectionBeans中删除服务连接对应的数据。
- 删除MBeanRegistry中对应的数据。
最后对configureSaslLogin方法进行分析,具体处理代码如下。
protected void configureSaslLogin() throws IOException {
  // 从系统环境中获取zookeeper.sasl.serverconfig对应的数据,默认Server
  String serverSection = System.getProperty(ZooKeeperSaslServer.LOGIN_CONTEXT_NAME_KEY,
                                            ZooKeeperSaslServer.DEFAULT_LOGIN_CONTEXT_NAME);
  // 应用程序配置条目
  AppConfigurationEntry entries[] = null;
  SecurityException securityException = null;
  try {
    // 获取AppConfigurationEntries属性
    entries = Configuration.getConfiguration().getAppConfigurationEntry(serverSection);
  } catch (SecurityException e) {
    securityException = e;
  }

  // 应用程序配置条目为空
  if (entries == null) {
    // 读取系统变量java.security.auth.login.config
    String jaasFile = System.getProperty(Environment.JAAS_CONF_KEY);
    // 读取系统变量zookeeper.sasl.serverconfig
    String loginContextName =
      System.getProperty(ZooKeeperSaslServer.LOGIN_CONTEXT_NAME_KEY);
    // 异常对象不为空
    // 系统变量zookeeper.sasl.serverconfig不为空或者java.security.auth.login.config连接不为空
    if (securityException != null && (loginContextName != null || jaasFile != null)) {
      String errorMessage =
        "No JAAS configuration section named '" + serverSection + "' was found";
      if (jaasFile != null) {
        errorMessage += " in '" + jaasFile + "'.";
      }
      if (loginContextName != null) {
        errorMessage +=
          " But " + ZooKeeperSaslServer.LOGIN_CONTEXT_NAME_KEY + " was set.";
      }
      LOG.error(errorMessage);
      throw new IOException(errorMessage);
    }
    // 结束处理
    return;
  }

  // jaas.conf entry available
  try {
    // 创建成员变量 saslServerCallbackHandler和login并开启login变量中的线程
    saslServerCallbackHandler =
      new SaslServerCallbackHandler(Configuration.getConfiguration());
    login = new Login(serverSection, saslServerCallbackHandler, new ZKConfig());
    login.startThreadIfNeeded();
  } catch (LoginException e) {
    throw new IOException(
      "Could not configure server because SASL configuration did not allow the "
      + " ZooKeeper server to authenticate itself properly: " + e);
  }
}
在上述代码中核心处理流程如下。
- 从系统环境中获取zookeeper.sasl.serverconfig对应的数据,默认数据值为Server。
- 从配置(javax.security.auth.login.Configuration)中获取AppConfigurationEntry数据集合,如果获取期间存在异常会将异常信息暂存到securityException变量中。
- 如果AppConfigurationEntry数据集合为空则需要进行如下操作。
- 读取系统变量java.security.auth.login.config和系统变量zookeeper.sasl.serverconfig。
- 如果第(2)步中的异常对象不为空并且系统变量zookeeper.sasl.serverconfig不为空或者java.security.auth.login.config连接不为空将抛出异常。
- 创建成员变量 saslServerCallbackHandler和login并开启login变量中的线程
SaslServerCallbackHandler 分析
本节将对SaslServerCallbackHandler类进行分析,在ServerCnxnFactory类中对SaslServerCallbackHandler类进行了初始化操作,具体构造函数代码如下。
public SaslServerCallbackHandler(Configuration configuration)
  throws IOException {
  // 读取系统变量zookeeper.sasl.serverconfig,默认值Server
  String serverSection = System.getProperty(
    ZooKeeperSaslServer.LOGIN_CONTEXT_NAME_KEY,
    ZooKeeperSaslServer.DEFAULT_LOGIN_CONTEXT_NAME);
  // 获取serverSection对应的AppConfigurationEntry集合
  AppConfigurationEntry[] configurationEntries =
    configuration.getAppConfigurationEntry(serverSection);

  // 如果AppConfigurationEntry集合为空抛出异常
  if (configurationEntries == null) {
    String errorMessage = "Could not find a '" + serverSection
      + "' entry in this configuration: Server cannot start.";
    LOG.error(errorMessage);
    throw new IOException(errorMessage);
  }
  // 证书容器进行清理操作
  credentials.clear();
  // 循环AppConfigurationEntry集合
  for (AppConfigurationEntry entry : configurationEntries) {
    Map<String, ?> options = entry.getOptions();
    for (Map.Entry<String, ?> pair : options.entrySet()) {
      String key = pair.getKey();
      // 数据信息是以user_开头将信息放入到证书容器中
      if (key.startsWith(USER_PREFIX)) {
        String userName = key.substring(USER_PREFIX.length());
        credentials.put(userName, (String) pair.getValue());
      }
    }
  }
}
在上述代码中核心处理流程如下。
- 从系统环境中获取zookeeper.sasl.serverconfig对应的数据,默认数据值为Server。
- 在参数configuration中获取serverSection对应的AppConfigurationEntry集合。
- 如果AppConfigurationEntry集合为空则抛出异常。
- 对证书容器(credentials)进行清理操作。
- 循环AppConfigurationEntry集合,如果其中的数据键以
user_开头将会做切分操作,保留user_后的数据,将其作为key,将值数据放入到证书容器(credentials)中。
上述操作流程是构造函数的细节,接下来将对回调方法进行分析,负责处理的方法是handle,具体处理代码如下。
public void handle(Callback[] callbacks) throws UnsupportedCallbackException {
  for (Callback callback : callbacks) {
    if (callback instanceof NameCallback) {
      handleNameCallback((NameCallback) callback);
    } else if (callback instanceof PasswordCallback) {
      handlePasswordCallback((PasswordCallback) callback);
    } else if (callback instanceof RealmCallback) {
      handleRealmCallback((RealmCallback) callback);
    } else if (callback instanceof AuthorizeCallback) {
      handleAuthorizeCallback((AuthorizeCallback) callback);
    }
  }
}
在上述代码中会循环参数回调集合,然后根据不同回调集合类型进行操作。如果回调类型是NameCallback类型则会调用handleNameCallback方法进行处理,具体处理代码如下。
private void handleNameCallback(NameCallback nc) {
  if (credentials.get(nc.getDefaultName()) == null) {
    LOG.warn("User '" + nc.getDefaultName()
             + "' not found in list of DIGEST-MD5 authenticateable users.");
    return;
  }
  nc.setName(nc.getDefaultName());
  userName = nc.getDefaultName();
}
在上述代码中会判断证书容器中是否存在defaultName变量对应的证书,如果不存在则跳过处理,如果存在则需要将defaultName变量放入到参数的name变量中,同时要将成员变量username设置为defaultName变量值。
如果回调类型是PasswordCallback则会调用handlePasswordCallback方法进行处理,具体处理代码如下。
private void handlePasswordCallback(PasswordCallback pc) {
  if ("super".equals(this.userName) && System.getProperty(SYSPROP_SUPER_PASSWORD) != null) {
    pc.setPassword(System.getProperty(SYSPROP_SUPER_PASSWORD).toCharArray());
  } else if (credentials.containsKey(userName)) {
    pc.setPassword(credentials.get(userName).toCharArray());
  } else {
    LOG.warn("No password found for user: " + userName);
  }
}
在上述代码中核心处理流程如下。
- 如果成员变量userName是super,并且系统环境中的zookeeper.SASLAuthenticationProvider.superPassword属性不为空,则需要将参数pc的密码进行设置,设置的数据是系统环境中的zookeeper.SASLAuthenticationProvider.superPassword属性。
- 如果证书容器中存在userName对应的证书,则需要将证书转换后放入到参数pc的密码属性中。
- 其他情况进行警告日志输出。
如果回调类型是RealmCallback则会调用handleRealmCallback方法进行处理,具体处理代码如下。
private void handleRealmCallback(RealmCallback rc) {
  LOG.debug("client supplied realm: " + rc.getDefaultText());
  rc.setText(rc.getDefaultText());
}
在上述代码中核心是将参数中的defaultText属性设置到inputText属性。最后如果回调类型是AuthorizeCallback则会调用handleAuthorizeCallback方法进行处理,具体处理代码如下。
private void handleAuthorizeCallback(AuthorizeCallback ac) {
  // 获取身份验证id
  String authenticationID = ac.getAuthenticationID();
  // 获取授权id
  String authorizationID = ac.getAuthorizationID();

  LOG.info("Successfully authenticated client: authenticationID=" + authenticationID
           + ";  authorizationID=" + authorizationID + ".");
  // 是否允许授权,设置为允许
  ac.setAuthorized(true);
  // 创建KerberosName对象
  KerberosName kerberosName = new KerberosName(authenticationID);
  try {
    // 用户名构造,初始化值:短名字
    StringBuilder userNameBuilder = new StringBuilder(kerberosName.getShortName());
    // 是否需要追加host,如果需要则追加
    if (shouldAppendHost(kerberosName)) {
      userNameBuilder.append("/").append(kerberosName.getHostName());
    }
    // 是否需要追加域(realm)
    if (shouldAppendRealm(kerberosName)) {
      userNameBuilder.append("@").append(kerberosName.getRealm());
    }
    LOG.info("Setting authorizedID: " + userNameBuilder);
    // 设置授权id
    ac.setAuthorizedID(userNameBuilder.toString());
  } catch (IOException e) {
    LOG.error("Failed to set name based on Kerberos authentication rules.", e);
  }
}
在上述代码中核心是对认证回调对象进行数据设置,具体处理流程如下。
- 从参数中湖区身份验证id和授权id。
- 设置是否允许授权设置为允许状态。
- 创建KerberosName对象。
- 构造用户名信息,构造完成后设置到authorizedID属性中,构造过程如下。
- 将KerberosName对象中的短名称加入到字符串中,放在首位。
- 判断是否需要追加host,如果需要则追加,追加时使用斜杠分割。
- 判断是否需要追加域,如果需要则追加,追加时使用@符号进行分割。
Login 分析
本节将对Login类进行分析,该类的核心是一个线程,该类基于javax.security.auth包下的各项安全接口、安全类进行实现,关于该线程的构造是在构造函数中,注意该线程是一个守护线程,该线程的具体执行代码如下。
new Thread(new Runnable() {
  public void run() {
    LOG.info("TGT refresh thread started.");
    while (true) {
      // 获取 KerberosTicket
      KerberosTicket tgt = getTGT();
      // 获取当前时间
      long now = Time.currentWallTime();
      // 下次刷新时间
      long nextRefresh;
      Date nextRefreshDate;
      // 如果变量tgt为空,重新计算时间
      if (tgt == null) {
        nextRefresh = now + MIN_TIME_BEFORE_RELOGIN;
        nextRefreshDate = new Date(nextRefresh);
        LOG.warn("No TGT found: will try again at {}", nextRefreshDate);
      }
      else {
        // 根据tgt计算下一次刷新时间
        nextRefresh = getRefreshTime(tgt);
        // 结算过期时间
        long expiry = tgt.getEndTime().getTime();
        Date expiryDate = new Date(expiry);
        // 使用Ticket缓存,
        // tgt中的endTime和renewTill相同
        if ((isUsingTicketCache) && (tgt.getEndTime().equals(tgt.getRenewTill()))) {
          Object[] logPayload = {expiryDate, principal, principal};
          LOG.error("The TGT cannot be renewed beyond the next expiry date: {}." +
                    "This process will not be able to authenticate new SASL connections after that "
                    +
                    "time (for example, it will not be authenticate a new connection with a Zookeeper "
                    +
                    "Quorum member).  Ask your system administrator to either increase the "
                    +
                    "'renew until' time by doing : 'modprinc -maxrenewlife {}' within "
                    +
                    "kadmin, or instead, to generate a keytab for {}. Because the TGT's "
                    +
                    "expiry cannot be further extended by refreshing, exiting refresh thread now.",
                    logPayload);
          return;
        }
        // 下一次刷新时间大于过期时间
        // 当前时间+最小重新登陆时间大于过期时间
        if ((nextRefresh > expiry) ||
            ((now + MIN_TIME_BEFORE_RELOGIN) > expiry)) {
          nextRefresh = now;
        }
        else {
          // 下一次刷新时间小于当前时间+最小重新登陆时间
          if (nextRefresh < (now + MIN_TIME_BEFORE_RELOGIN)) {
            Date until = new Date(nextRefresh);
            Date newuntil = new Date(now + MIN_TIME_BEFORE_RELOGIN);
            Object[] logPayload =
            {until, newuntil, (MIN_TIME_BEFORE_RELOGIN / 1000)};
            LOG.warn("TGT refresh thread time adjusted from : {} to : {} since "
                     + "the former is sooner than the minimum refresh interval ("
                     + "{} seconds) from now.", logPayload);
          }
          // 计算下一次刷新时间
          nextRefresh = Math.max(nextRefresh, now + MIN_TIME_BEFORE_RELOGIN);
        }
        // 创建下一次刷新时间(数据类型是Date)
        nextRefreshDate = new Date(nextRefresh);
        // 如果下一次刷新时间大于过期时间
        if (nextRefresh > expiry) {
          Object[] logPayload = {nextRefreshDate, expiryDate};
          LOG.error("next refresh: {} is later than expiry {}."
                    + " This may indicate a clock skew problem. Check that this host and the KDC's "
                    + "hosts' clocks are in sync. Exiting refresh thread.",
                    logPayload);
          return;
        }
      }
      // 当前时间等于下一次刷新时间
      if (now == nextRefresh) {
        LOG.info(
          "refreshing now because expiry is before next scheduled refresh time.");
      }
      // 当前时间小于下一次刷新时间
      else if (now < nextRefresh) {
        Date until = new Date(nextRefresh);
        LOG.info("TGT refresh sleeping until: {}", until.toString());
        try {
          // 等待一定时间
          Thread.sleep(nextRefresh - now);
        } catch (InterruptedException ie) {
          LOG.warn("TGT renewal thread has been interrupted and will exit.");
          break;
        }
      }
      // 大于跳过
      else {
        LOG.error("nextRefresh:{} is in the past: exiting refresh thread. Check"
                  + " clock sync between this host and KDC - (KDC's clock is likely ahead of this host)."
                  + " Manual intervention will be required for this client to successfully authenticate."
                  + " Exiting refresh thread.", nextRefreshDate);
        break;
      }
      // 使用Ticket缓存
      if (isUsingTicketCache) {
        // 获取 zookeeper.kinit 属性,默认值:/usr/bin/kinit
        String cmd =
          zkConfig.getProperty(ZKConfig.KINIT_COMMAND, KINIT_COMMAND_DEFAULT);
        String kinitArgs = "-R";
        int retry = 1;
        // 在重试范围内进行shell命令执行
        while (retry >= 0) {
          try {
            LOG.debug("running ticket cache refresh command: {} {}", cmd,
                      kinitArgs);
            Shell.execCommand(cmd, kinitArgs);
            break;
          } catch (Exception e) {
            if (retry > 0) {
              --retry;
              // sleep for 10 seconds
              try {
                Thread.sleep(10 * 1000);
              } catch (InterruptedException ie) {
                LOG.error(
                  "Interrupted while renewing TGT, exiting Login thread");
                return;
              }
            } else {
              Object[] logPayload = {cmd, kinitArgs, e.toString(), e};
              LOG.warn(
                "Could not renew TGT due to problem running shell command: '{}"
                + " {}'; exception was:{}. Exiting refresh thread.",
                logPayload);
              return;
            }
          }
        }
      }
      try {
        int retry = 1;
        // 在重试次数范围内进行重新登陆操作
        while (retry >= 0) {
          try {
            reLogin();
            break;
          } catch (LoginException le) {
            if (retry > 0) {
              --retry;
              // sleep for 10 seconds.
              try {
                Thread.sleep(10 * 1000);
              } catch (InterruptedException e) {
                LOG.error(
                  "Interrupted during login retry after LoginException:",
                  le);
                throw le;
              }
            } else {
              LOG.error("Could not refresh TGT for principal: {}.", principal,
                        le);
            }
          }
        }
      } catch (LoginException le) {
        LOG.error("Failed to refresh TGT: refresh thread exiting now.", le);
        break;
      }
    }
  }
})
在上述代码中核心处理流程如下。
- 通过getTGT方法获取KerberosTicket对象,使用变量tgt存储
- 获取当前时间。
- 创建下 一次刷新时间的存储变量(nextRefresh,nextRefreshDate)。
- 如果tgt变量为空更新下一次刷新时间,计算规则:当前时间+最小重新登陆时间。反之则需要进行如下来计算下一次刷新时间。
- 使用getRefreshTime方法计算下一次刷新时间。
- 根据tgt计算过期时间。
- 如果使用Ticket缓存,并且tgt中的endTime和renewTill相同则进行异常日志记录并结束处理。
- 如果下一次刷新时间大于过期时间或者当前时间+最小重新登陆时间大于过期时间则需要将下一次刷新时间设置为当前时间。如果不满足则需要在nextRefresh和当前时间+最小重新登陆时间之间取大值赋值到下一次刷新时间。
- 如果下一次刷新时间大于过期时间记录异常日志并结束处理。
- 如果当前时间等于下一次刷新时间记录日志不做处理。
- 如果当前时间小于下一次刷新时间则进行线程等待,等待时间:下一次刷新时间-当前时间。
- 如果当前时间大于下一次刷新时间则跳过处理。
- 如果使用Ticket缓存从zk配置中获取zookeeper.kinit属性,默认值为/usr/bin/kinit,然后在允许的重试次数范围内进行shell命令的处理。
- 在重试次数范围内进行重新登陆操作(执行reLogin方法)。
NettyServerCnxnFactory 分析
本节将对NettyServerCnxnFactory类进行分析,该类是基于Netty框架实现的ServerCnxnFactory类,核心对构造函数进行分析,具体处理代码如下。
NettyServerCnxnFactory() {
  x509Util = new ClientX509Util();

  boolean usePortUnification = Boolean.getBoolean(PORT_UNIFICATION_KEY);
  LOG.info("{}={}", PORT_UNIFICATION_KEY, usePortUnification);
  if (usePortUnification) {
    try {
      QuorumPeerConfig.configureSSLAuth();
    } catch (QuorumPeerConfig.ConfigException e) {
      LOG.error("unable to set up SslAuthProvider, turning off client port unification",
                e);
      usePortUnification = false;
    }
  }
  this.shouldUsePortUnification = usePortUnification;

  EventLoopGroup bossGroup = NettyUtils.newNioOrEpollEventLoopGroup(
    NettyUtils.getClientReachableLocalInetAddressCount());
  EventLoopGroup workerGroup = NettyUtils.newNioOrEpollEventLoopGroup();
  ServerBootstrap bootstrap = new ServerBootstrap()
    .group(bossGroup, workerGroup)
    .channel(NettyUtils.nioOrEpollServerSocketChannel())
    // parent channel options
    .option(ChannelOption.SO_REUSEADDR, true)
    // child channels options
    .childOption(ChannelOption.TCP_NODELAY, true)
    .childOption(ChannelOption.SO_LINGER, -1)
    .childHandler(new ChannelInitializer<SocketChannel>() {
      @Override
      protected void initChannel(SocketChannel ch) throws Exception {
        ChannelPipeline pipeline = ch.pipeline();
        if (secure) {
          initSSL(pipeline, false);
        } else if (shouldUsePortUnification) {
          initSSL(pipeline, true);
        }
        pipeline.addLast("servercnxnfactory", channelHandler);
      }
    });
  this.bootstrap = configureBootstrapAllocator(bootstrap);
  this.bootstrap.validate();
}
在上述代码中核心完成各项成员变量的初始化,在其中要关注bossGroup变量和workerGroup变量,它们的具体类有两种:EpollEventLoopGroup和NioEventLoopGroup。在构造函数中还需要关注bootstrap变量的初始化,在初始化中最重要的是SSL相关处理,具体是添加一些ChannelHandler接口实现类,处理方法是initSSL,具体处理代码如下。
private synchronized void initSSL(ChannelPipeline p, boolean supportPlaintext)
  throws X509Exception, KeyManagementException, NoSuchAlgorithmException {
  // 获取 zookeeper.ssl.authProvider 属性
  String authProviderProp = System.getProperty(x509Util.getSslAuthProviderProperty());
  // SSL上下文
  SslContext nettySslContext;
  // zookeeper.ssl.authProvider属性为空
  if (authProviderProp == null) {
    // 获取默认的SSL上下文以及操作项
    SSLContextAndOptions sslContextAndOptions = x509Util.getDefaultSSLContextAndOptions();
    // 创建SSL上下文
    nettySslContext = sslContextAndOptions.createNettyJdkSslContext(
      sslContextAndOptions.getSSLContext(), false);
  }
  // zookeeper.ssl.authProvider属性不为空
  else {
    // 获取TLSv1.2对应的SSL上下文
    SSLContext sslContext = SSLContext.getInstance(ClientX509Util.DEFAULT_PROTOCOL);
    // 获取身份认证器
    X509AuthenticationProvider authProvider =
      (X509AuthenticationProvider) ProviderRegistry.getProvider(
      System.getProperty(x509Util.getSslAuthProviderProperty(), "x509"));

    // 身份认证器为空抛出异常
    if (authProvider == null) {
      LOG.error("Auth provider not found: {}", authProviderProp);
      throw new SSLContextException(
        "Could not create SSLContext with specified auth provider: " +
        authProviderProp);
    }

    // SSL上下文初始化
    sslContext.init(new X509KeyManager[]{authProvider.getKeyManager()},
                    new X509TrustManager[]{authProvider.getTrustManager()},
                    null);
    // 赋值SSL上下文
    nettySslContext = x509Util.getDefaultSSLContextAndOptions()
      .createNettyJdkSslContext(sslContext, false);
  }

  // 支持明文
  if (supportPlaintext) {
    p.addLast("ssl", new DualModeSslHandler(nettySslContext));
    LOG.debug("dual mode SSL handler added for channel: {}", p.channel());
  }
  else {
    p.addLast("ssl", nettySslContext.newHandler(p.channel().alloc()));
    LOG.debug("SSL handler added for channel: {}", p.channel());
  }
}
在上述代码中核心处理流程如下。
- 从系统变量中获取zookeeper.ssl.authProvider属性。
- 创建SSL上下文,此时并未有具体数据。
- 如果zookeeper.ssl.authProvider属性为空,则采用默认的方式创建SSL上下文,并赋值到第(2)步变量中,反之则需要通过如下操作创建SSL上下文并赋值到第(2)步变量中。
- 通过SSL上下文实例获取TLSv1.2对应的SSL上下文。
- 获取身份认证器,如果身份认证器为空将抛出异常。
- 将TLSv1.2对应的SSL上下文进行初始化。
- 分装TLSv1.2SSL上下文将其赋值到SSL上下文中。
- 判断是否支持明文,如果支持则添加DualModeSslHandler处理器,反之则添加SslHandler处理器。
NIOServerCnxnFactory 分析
本节将对NIOServerCnxnFactory类进行分析,在该类中重点关注如下四个线程类。
- 类AbstractSelectThread是AcceptThread类和AcceptThread类的父类,存储公共数据信息。
- 类AcceptThread用于接收信息。
- 类SelectorThread用于选择工作池进行数据处理。
- 类ConnectionExpirerThread用于关闭过期的连接。
接下来先对AcceptThread类进行分析,在该类中需要关注的入口是run方法,具体处理代码如下。
public void run() {
  try {
    while (!stopped && !acceptSocket.socket().isClosed()) {
      try {
        select();
      } catch (RuntimeException e) {
        LOG.warn("Ignoring unexpected runtime exception", e);
      } catch (Exception e) {
        LOG.warn("Ignoring unexpected exception", e);
      }
    }
  } finally {
    closeSelector();
    // This will wake up the selector threads, and tell the
    // worker thread pool to begin shutdown.
    if (!reconfiguring) {
      NIOServerCnxnFactory.this.stop();
    }
    LOG.info("accept thread exitted run method");
  }
}
在上述代码中核心是通过死循环调用select方法,具体实现代码如下。
private void select() {
  try {
    selector.select();

    Iterator<SelectionKey> selectedKeys =
      selector.selectedKeys().iterator();
    while (!stopped && selectedKeys.hasNext()) {
      SelectionKey key = selectedKeys.next();
      selectedKeys.remove();

      if (!key.isValid()) {
        continue;
      }
      if (key.isAcceptable()) {
        if (!doAccept()) {
          pauseAccept(10);
        }
      } else {
        LOG.warn("Unexpected ops in accept select "
                 + key.readyOps());
      }
    }
  } catch (IOException e) {
    LOG.warn("Ignoring IOException while selecting", e);
  }
}
在上述代码中核心也是通过死循环进行处理,抛开死循环整体核心处理方法是doAccept,它就是AcceptThread类中的核心,具体处理代码如下。
private boolean doAccept() {
  // 是否处理
  boolean accepted = false;
  // socket通道
  SocketChannel sc = null;
  try {
    // 开启一个socket通道
    sc = acceptSocket.accept();
    // 是否处理标记已处理
    accepted = true;
    // 获取网络地址
    InetAddress ia = sc.socket().getInetAddress();
    // 获取客户端连接数量
    int cnxncount = getClientCnxnCount(ia);

    // 客户端最大连接数大于0
    // 客户端连接数量大于客户端最大连接数
    if (maxClientCnxns > 0 && cnxncount >= maxClientCnxns) {
      throw new IOException("Too many connections from " + ia
                            + " - max is " + maxClientCnxns);
    }

    LOG.debug("Accepted socket connection from "
              + sc.socket().getRemoteSocketAddress());
    sc.configureBlocking(false);

    // 获取一个选择器线程进行处理
    if (!selectorIterator.hasNext()) {
      selectorIterator = selectorThreads.iterator();
    }
    SelectorThread selectorThread = selectorIterator.next();
    // 处理socket通道,如果处理失败抛出异常
    if (!selectorThread.addAcceptedConnection(sc)) {
      throw new IOException(
        "Unable to add connection to selector queue"
        + (stopped ? " (shutdown in progress)" : ""));
    }
    acceptErrorLogger.flush();
  } catch (IOException e) {
    acceptErrorLogger.rateLimitLog(
      "Error accepting new connection: " + e.getMessage());
    fastCloseSock(sc);
  }
  return accepted;
}
在上述代码中核心处理流程如下。
- 创建是否处理成功的标记,初始值为false,表示处理失败。
- 创建socket通道存储变量,变量名sc。
- 通过成员变量acceptSocket开启一个socket通道。
- 将是否处理成功的标记设置为true,表示处理成功。
- 从变量sc中获取网络地址,并获取网络地址对应的客户端连接数量。如果同时满足以下两个条件则抛出异常,该异常表示连接数过多。
- 客户端最大连接数大于0。
- 客户端连接数量大于客户端最大连接数。
- 在selector迭代器中每次获取下一个选择器线程并执行addAcceptedConnection方法进行处理,如果处理失败则抛出异常。
通过上述分析可以发现在AcceptThread类中将SocketChannel类型的数据交给SelectorThread类进行处理,下面将对addAcceptedConnection方法进行分析,具体处理代码如下。
public boolean addAcceptedConnection(SocketChannel accepted) {
  if (stopped || !acceptedQueue.offer(accepted)) {
    return false;
  }
  wakeupSelector();
  return true;
}
在上述代码中核心是将参数accepted加入到acceptedQueue容器中。SelectorThread类是一个线程类,核心处理逻辑在run方法中,具体处理代码如下。
public void run() {
  try {
    while (!stopped) {
      try {
        select();
        processAcceptedConnections();
        processInterestOpsUpdateRequests();
      } catch (RuntimeException e) {
        LOG.warn("Ignoring unexpected runtime exception", e);
      } catch (Exception e) {
        LOG.warn("Ignoring unexpected exception", e);
      }
    }
    for (SelectionKey key : selector.keys()) {
      NIOServerCnxn cnxn = (NIOServerCnxn) key.attachment();
      if (cnxn.isSelectable()) {
        cnxn.close();
      }
      cleanupSelectionKey(key);
    }
    SocketChannel accepted;
    while ((accepted = acceptedQueue.poll()) != null) {
      fastCloseSock(accepted);
    }
    updateQueue.clear();
  } finally {
    closeSelector();
    NIOServerCnxnFactory.this.stop();
    LOG.info("selector thread exitted run method");
  }
}
在上述代码中核心处理流程如下。
- 通过select方法进行IO处理。
- 处理 acceptedQueue 中的数据。
- 处理 updateQueue 中的数据。
- 关闭selector容器中的key集合对应的连接对象。
- 关闭acceptedQueue容器中的通道。
在上诉处理流程中重点是select方法的IO处理,具体处理代码如下。
private void select() {
  try {
    selector.select();

    Set<SelectionKey> selected = selector.selectedKeys();
    ArrayList<SelectionKey> selectedList =
      new ArrayList<SelectionKey>(selected);
    Collections.shuffle(selectedList);
    Iterator<SelectionKey> selectedKeys = selectedList.iterator();
    while (!stopped && selectedKeys.hasNext()) {
      SelectionKey key = selectedKeys.next();
      selected.remove(key);

      if (!key.isValid()) {
        cleanupSelectionKey(key);
        continue;
      }
      if (key.isReadable() || key.isWritable()) {
        handleIO(key);
      } else {
        LOG.warn("Unexpected ops in select " + key.readyOps());
      }
    }
  } catch (IOException e) {
    LOG.warn("Ignoring IOException while selecting", e);
  }
}
在上述代码中核心处理流依靠死循环进行,具体循环内部关键方法是handleIO,它的处理代码如下。
private void handleIO(SelectionKey key) {
  IOWorkRequest workRequest = new IOWorkRequest(this, key);
  NIOServerCnxn cnxn = (NIOServerCnxn) key.attachment();
  cnxn.disableSelectable();
  key.interestOps(0);
  touchCnxn(cnxn);
  workerPool.schedule(workRequest);
}
此时已经找到了核心中的核心,在上述代码中会将IOWorkRequest类的具体实例交给WorkerService类进行请求处理,在WorkerService类中具体的处理是交给参数IOWorkRequest中的doWork方法进行,具体处理代码如下。
public void doWork() throws InterruptedException {
    if (!key.isValid()) {
        selectorThread.cleanupSelectionKey(key);
        return;
    }

    if (key.isReadable() || key.isWritable()) {
        cnxn.doIO(key);

        if (stopped) {
            cnxn.close();
            return;
        }
        if (!key.isValid()) {
            selectorThread.cleanupSelectionKey(key);
            return;
        }
        touchCnxn(cnxn);
    }

    cnxn.enableSelectable();
    if (!selectorThread.addInterestOpsUpdateRequest(key)) {
        cnxn.close();
    }
}
在这段代码中可以明确,最终处理IO操作的核心是NIOServerCnxn类。最后对ConnectionExpirerThread方法进行分析,具体分析方法是run,具体处理代码如下。
public void run() {
  try {
    while (!stopped) {
      long waitTime = cnxnExpiryQueue.getWaitTime();
      if (waitTime > 0) {
        Thread.sleep(waitTime);
        continue;
      }
      for (NIOServerCnxn conn : cnxnExpiryQueue.poll()) {
        conn.close();
      }
    }

  } catch (InterruptedException e) {
    LOG.info("ConnnectionExpirerThread interrupted");
  }
}
在上述代码中使用死循环进行处理,单层循环的处理流程如下。
- 从成员变量cnxnExpiryQueue中获取等待时间。如果等待时间大于0就进行等待,等待结束后进行下一个循环。
- 从cnxnExpiryQueue中关闭连接。
ServerCnxn 分析
本节将对ServerCnxn类进行分析,在Zookeeper中ServerCnxn类存在两个实现类分别是。
- 基于Netty实现的NettyServerCnxn
- 基于JDK NIO实现的NIOServerCnxn
对于ServerCnxn类的分析而言主要关注在两个部分,第一部分是成员变量介绍,具体信息见表
| 变量名称 | 变量类型 | 变量说明 |
|---|---|---|
| fourBytes | byte[] | 四字节变量 |
| established | Date | 连接创建时间 |
| packetsReceived | AtomicLong | 收到的数据包数量 |
| packetsSent | AtomicLong | 发送的数据包数量 |
| authInfo | ArrayList<Id> | 认证信息集合 |
| zooKeeperSaslServer | ZooKeeperSaslServer | sasl服务 |
| minLatency | long | 最小延迟 |
| maxLatency | long | 最大延迟 |
| lastOp | String | 最后的操作类型 |
| lastCxid | long | 客户端操作序号 |
| lastZxid | long | 最后的zxid |
| lastResponseTime | long | 最后响应时间 |
| lastLatency | long | 最后延迟时间 |
| count | long | 请求处理次数 |
| totalLatency | long | 总计延迟时间 |
| isOldClient | boolean | 是否是旧的客户端 |
第二部分方法说明,在ServerCnxn类中的所实现的方法有一部分来自Stats接口和Watcher接口这些方法的作用如下。
- 方法getSessionTimeout:获取session超时时间
- 方法setSessionTimeout:设置session超时时间
- 方法close:关闭服务
- 方法sendResponse:发送响应
- 方法sendCloseSession:发送关闭session信息
- 方法process:处理观察者事件
- 方法getSessionId:获取sessionId
- 方法setSessionId:设置sessionId
- 方法getAuthInfo:获取Id(认证)信息
- 方法addAuthInfo:添加Id(认证)信息
- 方法removeAuthInfo:移除Id(认证)信息
- 方法sendBuffer:发送字节数据
- 方法enableRecv:恢复数据接收
- 方法disableRecv:禁止接收数据
- 方法packetReceived:接收数据包
- 方法packetSent:发送数据包
- 方法serverStats:获取服务统计
- 方法resetStats:重置服务统计信息
- 方法incrPacketsReceived:接收数据包数量加1
- 方法incrOutstandingRequests:增加未完成的请求数量
- 方法incrPacketsSent:发送数据包数量加1
- 方法updateStatsForResponse:在响应阶段更新统计信息
- 方法getEstablished:获取连接创建时间
- 方法getOutstandingRequests:获取未完成的请求数量
- 方法getPacketsReceived:获取已经处理的数据包数量
- 方法getPacketsSent:获取已经发送的数据包数量
- 方法getMinLatency:获取最小延迟
- 方法getAvgLatency:获取平均延迟
- 方法getMaxLatency:获取最大延迟
- 方法getLastOperation:获取最后一个操作类型
- 方法getLastCxid:客户端操作序号(客户端操作序号)
- 方法getLastZxid:获取最后的zxid
- 方法getLastResponseTime:获取最后响应时间
- 方法getLastLatency:获取最后延迟时间
- 方法getRemoteSocketAddress:获取远端套接字地址
- 方法getInterestOps:获取可行的操作
- 方法isSecure:是否启用sasl
- 方法getClientCertificateChain:获取证书
- 方法setClientCertificateChain:设置证书
- 方法dumpConnectionInfo:输出连接信息
- 方法getConnectionInfo:获取连接信息
- 方法cleanupWriterSocket:清理输出对象
在上述方法中方法getConnectionInfo和方法dumpConnectionInfo会依赖其他方法来完成具体实现
AdminServer 分析
本节将对AdminServer接口进行分析,AdminServer接口用于进行管理服务,核心实现类是JettyAdminServer,下面先介绍AdminServer接口的定义,定义代码如下。
@InterfaceAudience.Public
public interface AdminServer {
    /**
    * 启动
    */
  void start() throws AdminServerException;

  /**
    * 关闭
    */
  void shutdown() throws AdminServerException;

  /**
    * 设置Zookeeper服务
    */
  void setZooKeeperServer(ZooKeeperServer zkServer);

  @InterfaceAudience.Public
  class AdminServerException extends Exception {
      private static final long serialVersionUID = 1L;

      public AdminServerException(String message, Throwable cause) {
        super(message, cause);
      }

      public AdminServerException(Throwable cause) {
        super(cause);
      }
    }
}
在AdminServer接口中定义了三个方法和一个类。
- 方法start用于启动AdminServer
- 方法shutdown用于关闭AdminServer。
- 方法setZooKeeperServer用于向AdminServer中设置ZooKeeperServer。
- 类AdminServerException用于定义AdminServer中的异常。
接下来进入到JettyAdminServer类的分析,首先是构造函数的分析,先看无参构造函数,具体代码如下。
public JettyAdminServer() throws AdminServerException {
  this(System.getProperty("zookeeper.admin.serverAddress", DEFAULT_ADDRESS),
          Integer.getInteger("zookeeper.admin.serverPort", DEFAULT_PORT),
          Integer.getInteger("zookeeper.admin.idleTimeout", DEFAULT_IDLE_TIMEOUT),
          System.getProperty("zookeeper.admin.commandURL", DEFAULT_COMMAND_URL));
}
在上述代码中核心通过环境变量读取相关数据然后构造JettyAdminServer类,具体读取信息如下。
- 变量address对应环境变量zookeeper.admin.serverAddress。
- 变量port对应环境变量zookeeper.admin.serverPort。
- 变量timeout对应环境变量zookeeper.admin.idleTimeout。
- 变量commandUrl对应环境变量zookeeper.admin.commandURL。
了解无参构造函数以后需要对有参构造函数进行说明,具体处理代码如下。
public JettyAdminServer(String address, int port, int timeout, String commandUrl) {
  this.port = port;
  this.idleTimeout = timeout;
  this.commandUrl = commandUrl;
  this.address = address;

  server = new Server();
  ServerConnector connector = new ServerConnector(server);
  connector.setHost(address);
  connector.setPort(port);
  connector.setIdleTimeout(idleTimeout);
  server.addConnector(connector);

  ServletContextHandler context = new ServletContextHandler(ServletContextHandler.SESSIONS);
  context.setContextPath("/*");
  constrainTraceMethod(context);
  server.setHandler(context);

  context.addServlet(new ServletHolder(new CommandServlet()), commandUrl + "/*");
}
在上述代码中核心完成成员变量server的初始化,它是Jetty的核心类。在上述代码中最重要的是引出CommandServlet类,它能够进行命令行处理,具体处理是支持GET方法的,具体处理代码如下。
protected void doGet(HttpServletRequest request, HttpServletResponse response)
        throws ServletException, IOException {
    // Capture the command name from the URL
    // 获取命令
    String cmd = request.getPathInfo();
    // 命令为空或者命令是/
    if (cmd == null || cmd.equals("/")) {
        // No command specified, print links to all commands instead
        for (String link : commandLinks()) {
            response.getWriter().println(link);
            response.getWriter().println("<br/>");
        }
        return;
    }
    // Strip leading "/"
    // 将命令中的第一个符号斜杠去掉,保留真实的命令
    cmd = cmd.substring(1);

    // Extract keyword arguments to command from request parameters
    // 从请求中获取参数
    @SuppressWarnings("unchecked")
    Map<String, String[]> parameterMap = request.getParameterMap();
    Map<String, String> kwargs = new HashMap<String, String>();
    for (Map.Entry<String, String[]> entry : parameterMap.entrySet()) {
        kwargs.put(entry.getKey(), entry.getValue()[0]);
    }

    // Run the command
    // 执行命令得到命令执行结果
    CommandResponse cmdResponse = Commands.runCommand(cmd, zkServer, kwargs);

    // Format and print the output of the command
    // 写出命令执行结果
    CommandOutputter outputter = new JsonOutputter();
    response.setStatus(HttpServletResponse.SC_OK);
    response.setContentType(outputter.getContentType());
    outputter.output(cmdResponse, response.getWriter());
}
在上述代码中核心处理流程如下。
- 从请求中获取路径信息,该路径信息是后续需要执行的命令。
- 如果命令为空或者命令是斜杠则将支持的命令写出。支持的命令在org.apache.zookeeper.server.admin.Commands静态方法中有初始化操作。
- 将命令中的第一个符号斜杠去掉,保留真实的命令。
- 从请求中获取参数。
- 执行命令得到命令执行结果。
- 写出命令执行结果。
在上述处理流程中会使用到命令对象来完成命令的处理,下面以配置命令进行处理流程进行说明。首先需要明确配置命令的具体值,具体值在ConfCommand类的构造函数中,具体代码如下。
public ConfCommand() {
    super(Arrays.asList("configuration", "conf", "config"));
}
上述代码中可以明确配置命令有三个configuration、conf和config。了解命令以后需要对命令的处理进行分析,入口方法是Commands.runCommand,具体处理代码如下。
public static CommandResponse runCommand(String cmdName,
                                          ZooKeeperServer zkServer,
                                          Map<String, String> kwargs) {
    if (!commands.containsKey(cmdName)) {
        return new CommandResponse(cmdName, "Unknown command: " + cmdName);
    }
    if (zkServer == null || !zkServer.isRunning()) {
        return new CommandResponse(cmdName,
                "This ZooKeeper instance is not currently serving requests");
    }
    return commands.get(cmdName).run(zkServer, kwargs);
}
在上述代码中核心处理流程如下。
- 命令行集合中不存在当前命令将返回未知命令行信息。
- 如果zk服务不存在则返回Zookeeper实例未启动信息。
- 从命令行集合中获取命令对象然后执行。
在配置命令中对于响应的处理代码如下。
public CommandResponse run(ZooKeeperServer zkServer, Map<String, String> kwargs) {
    CommandResponse response = initializeResponse();
    response.putAll(zkServer.getConf().toMap());
    return response;
}
在上述代码中会获取Zookeeper服务的配置信息将其放入到命令响应结果中。
ContainerManager 分析
本节将对ContainerManager类进行分析,在该类中核心是进行定时任务的处理,任务细节是删除容器节点,定时任务的初始化方法是start,具体代码如下
public void start() {
  if (task.get() == null) {
      TimerTask timerTask = new TimerTask() {
          @Override
          public void run() {
              try {
                  checkContainers();
              } catch (InterruptedException e) {
                  Thread.currentThread().interrupt();
                  LOG.info("interrupted");
                  cancel();
              } catch (Throwable e) {
                  LOG.error("Error checking containers", e);
              }
          }
      };
      if (task.compareAndSet(null, timerTask)) {
          timer.scheduleAtFixedRate(timerTask, checkIntervalMs,
                  checkIntervalMs);
      }
  }
}
在上述代码中会从成员变量task中获取一个任务,如果任务为空则进行如下操作。
- 创建TimerTask类,核心处理方法是checkContainers。
- 向成员变量task中加入第(1)步创建的TimerTask类,然后开启定时任务。
接下来对checkContainers方法进行分析,在该方法中核心是进行容器删除的请求处理,具体处理代码如下。
public void checkContainers()
        throws InterruptedException {
    // 间隔时间
    long minIntervalMs = getMinIntervalMs();
    // 循环容器路径
    for (String containerPath : getCandidates()) {
        // 获取当前时间
        long startMs = Time.currentElapsedTime();

        // 将容器路径字符串转换为请求
        ByteBuffer path = ByteBuffer.wrap(containerPath.getBytes());
        Request request = new Request(null, 0, 0,
                ZooDefs.OpCode.deleteContainer, path, null);
        try {
            LOG.info("Attempting to delete candidate container: {}",
                    containerPath);
            // 处理请求
            requestProcessor.processRequest(request);
        } catch (Exception e) {
            LOG.error("Could not delete container: {}",
                    containerPath, e);
        }

        // 计算时间差,当前时间-开始时间
        long elapsedMs = Time.currentElapsedTime() - startMs;
        // 间隔时间-时间差,如果还有剩余需要进行线程等待
        long waitMs = minIntervalMs - elapsedMs;
        if (waitMs > 0) {
            Thread.sleep(waitMs);
        }
    }
}
在上述代码中核心处理流程如下。
- 通过getMinIntervalMs方法获取时间间隔。
- 循环容器路径集合对单个容器路径进行如下处理。
- 获取当前时间,含义是开始时间。
- 将容器路径字符串转换为请求,将改请求交给请求处理器进行处理。
- 计算时间差,计算规则:当前时间-开始时间。
- 如果时间间隔-时间差的结果值大于0则进行线程等待。
了解定时任务的核心处理流程后下面将对容器路径的获取进行分析,具体处理方法是getCandidates,处理代码如下。
protected Collection<String> getCandidates() {
    Set<String> candidates = new HashSet<String>();
    // 从zk数据库中获取容器路径集合
    for (String containerPath : zkDb.getDataTree().getContainers()) {
        // 获取容器路径对应的数据节点
        DataNode node = zkDb.getDataTree().getNode(containerPath);
        // 数据节点不为空
        // 数据节点中的 cversion 大于0
        // 子节点数量为0
        if ((node != null) && (node.stat.getCversion() > 0) &&
                (node.getChildren().size() == 0)) {
            candidates.add(containerPath);
        }
    }

    // 从zk数据库中获取过期路径集合
    for (String ttlPath : zkDb.getDataTree().getTtls()) {
        // 获取过期路径对应的数据节点
        DataNode node = zkDb.getDataTree().getNode(ttlPath);
        // 数据节点不为空
        if (node != null) {
            // 获取子节点路径集合
            Set<String> children = node.getChildren();
            // 子节点路径集合为空
            // 子节点路径数量为0
            if ((children == null) || (children.size() == 0)) {
                // EphemeralType类型是TTL
                if (EphemeralType.get(node.stat.getEphemeralOwner()) == EphemeralType.TTL) {
                    // 获取过期时间
                    long ttl = EphemeralType.TTL.getValue(node.stat.getEphemeralOwner());
                    // 过期时间不为0
                    // 节点过期时间大于ttl时间
                    if ((ttl != 0) && (getElapsed(node) > ttl)) {
                        candidates.add(ttlPath);
                    }
                }
            }
        }
    }
    return candidates;
}
在上述代码中主要处理两种类型的路径,第一种是存放在容器路径集合中的数据,第二种是存放在过期路径容器中的数据。第一种数据节点需要cversion大于零并且子节点数量为0才会加入到结果集合中,第二种数据节点需要过期时间不为0并且节点过期时间大于ttl时间(会话过期时间)才会加入到结果集合中
总结
本章对Zookeeper项目中的ZooKeeperServerMain类进行相关分析,该类主要用于单机版启动,主要分析该类的启动流程。在启动流程中涉及到如下几个类
- ServerCnxnFactory 用于生产ServerCnxn。
- AdminServer 用于进行服务管理。
- ContainerManager 用于进行容器路径管理。
本章对Zookeeper项目中的QuorumPeerMain类进行相关分析,该类主要用于分布式版本启动,主要围绕QuorumPeerMain类的启动流程进行分析,在启动过程中主要完成步骤如下。
- 读取配置信息转换为QuorumPeerConfig
- 创建数据目录清理器,用于对数据日志目录和快照目录进行清理
- 加载zk数据库。
- 启动选举。