ZooKeeper Startup Process Analysis
This chapter will analyze the startup process in the ZooKeeper project.
ZooKeeper Startup Overview (QuorumPeerMain Analysis)
To start the ZooKeeper service in the ZooKeeper project, you need to use the zkServer.sh or zkServer.cmd file. The former is used in Linux environments, while the latter is for Windows environments. Since the zkServer.sh file content is extensive, we will use the zkServer.cmd file to explain the startup process. The content of the zkServer.cmd file is as follows:
setlocal
call "%~dp0zkEnv.cmd"

set ZOOMAIN=org.apache.zookeeper.server.quorum.QuorumPeerMain
set ZOO_LOG_FILE=zookeeper-%USERNAME%-server-%COMPUTERNAME%.log

echo on
call %JAVA% "-Dzookeeper.log.dir=%ZOO_LOG_DIR%" "-Dzookeeper.root.logger=%ZOO_LOG4J_PROP%" "-Dzookeeper.log.file=%ZOO_LOG_FILE%" "-XX:+HeapDumpOnOutOfMemoryError" "-XX:OnOutOfMemoryError=cmd /c taskkill /pid %%%%p /t /f" -cp "%CLASSPATH%" %ZOOMAIN% "%ZOOCFG%" %*

endlocal
In the above code, you can see that it needs to execute a Java command, with the QuorumPeerMain class being the most crucial part. Let's analyze the QuorumPeerMain class. Since QuorumPeerMain is started via command line, we need to focus on the main method. The specific code is as follows:
public static void main(String[] args) {
    QuorumPeerMain main = new QuorumPeerMain();
    try {
        main.initializeAndRun(args);
    } catch (IllegalArgumentException e) {
        LOG.error("Invalid arguments, exiting abnormally", e);
        LOG.info(USAGE);
        System.err.println(USAGE);
        System.exit(2);
    } catch (ConfigException e) {
        LOG.error("Invalid config, exiting abnormally", e);
        System.err.println("Invalid config, exiting abnormally");
        System.exit(2);
    } catch (DatadirException e) {
        LOG.error("Unable to access datadir, exiting abnormally", e);
        System.err.println("Unable to access datadir, exiting abnormally");
        System.exit(3);
    } catch (AdminServerException e) {
        LOG.error("Unable to start AdminServer, exiting abnormally", e);
        System.err.println("Unable to start AdminServer, exiting abnormally");
        System.exit(4);
    } catch (Exception e) {
        LOG.error("Unexpected exception, exiting abnormally", e);
        System.exit(1);
    }
    LOG.info("Exiting normally");
    System.exit(0);
}
In the code above, it first constructs a QuorumPeerMain object, then calls the initializeAndRun method to complete the startup. The processing code for the initializeAndRun method is as follows:
protected void initializeAndRun(String[] args)
  throws ConfigException, IOException, AdminServerException {
  QuorumPeerConfig config = new QuorumPeerConfig();
  if (args.length == 1) {
    config.parse(args[0]);
  }

  // Data directory cleaner
  DatadirCleanupManager purgeMgr = new DatadirCleanupManager(config.getDataDir(),
                                                             config.getDataLogDir(),
                                                             config.getSnapRetainCount(),
                                                             config.getPurgeInterval());
  // Start the data directory cleanup manager
  purgeMgr.start();

  if (args.length == 1 && config.isDistributed()) {
    // Start from configuration
    runFromConfig(config);
  }
  else {
    LOG.warn("Either no config or no quorum defined in config, running "
             + " in standalone mode");
    ZooKeeperServerMain.main(args);
  }
}
The core process in the above code is as follows:
- Convert the first parameter from the startup command arguments into a QuorumPeerConfig object.
- Create a data directory cleaner (DatadirCleanupManager) and start it.
- If the startup command argument length is 1 and the configuration explicitly states it's distributed, execute the runFromConfig method to start. Otherwise, use the ZooKeeperServerMain.main method to start.
Next, we'll analyze the runFromConfig method. This method initializes the quorumPeer member variable, which can be understood as the candidate node. This member variable is crucial in the subsequent election process. Most of the parameters needed to initialize the quorumPeer member variable come from the configuration class (QuorumPeerConfig), with some being created in real-time. The most important part is the method executed after creation, with the specific code as follows:
quorumPeer.initialize();
quorumPeer.start();
Through the analysis of the initializeAndRun method and the runFromConfig method, we can see that the entire process will also involve DatadirCleanupManager and QuorumPeer (which will be analyzed during the election analysis, not in this chapter).
DatadirCleanupManager Analysis
This section will analyze the DatadirCleanupManager class, which is used for file cleanup. The cleanup includes transaction logs and snapshot files. The member variables in this class are shown in the table.
| Variable Name | Variable Type | Variable Description |
|---|---|---|
| snapDir | File | Snapshot directory |
| dataLogDir | File | Data log directory |
| snapRetainCount | int | Number of snapshots to retain |
| purgeInterval | int | Cleanup interval period |
| purgeTaskStatus | PurgeTaskStatus | Cleanup status, with three types:<br />1. NOT_STARTED: Not started<br />2. STARTED: Started<br />3. COMPLETED: Completed |
| timer | Timer | Timer |
After understanding the member variables, let's analyze the start method. The specific processing code is as follows:
public void start() {
  // If status is already started, do nothing
  if (PurgeTaskStatus.STARTED == purgeTaskStatus) {
    LOG.warn("Purge task is already running.");
    return;
  }
  // If cleanup interval is less than or equal to 0, do nothing
  if (purgeInterval <= 0) {
    LOG.info("Purge task is not scheduled.");
    return;
  }

  // Create timer
  timer = new Timer("PurgeTask", true);
  // Create timed task
  TimerTask task = new PurgeTask(dataLogDir, snapDir, snapRetainCount);
  // Start timed task
  timer.scheduleAtFixedRate(task, 0, TimeUnit.HOURS.toMillis(purgeInterval));

  // Set status to started
  purgeTaskStatus = PurgeTaskStatus.STARTED;
}
The core process in the above code is as follows:
- Check if the purgeTaskStatus member variable is STARTED. If so, do nothing.
- Check if the purgeInterval member variable is less than 0. If so, do nothing.
- Create a timer, put the PurgeTask timed task into the timer, and start the task.
- Set the purgeTaskStatus member variable to STARTED.
Based on the analysis of the above process, we can see that the most crucial part is the PurgeTask object, which is the core of the entire file cleanup. The core execution code is as follows:
@Override
public void run() {
  LOG.info("Purge task started.");
  try {
    PurgeTxnLog.purge(logsDir, snapsDir, snapRetainCount);
  } catch (Exception e) {
    LOG.error("Error occurred while purging.", e);
  }
  LOG.info("Purge task completed.");
}
This code delegates the process to the PurgeTxnLog.purge method, which requires three parameters:
- logsDir parameter: Data log directory
- snapsDir parameter: Snapshot log directory
- snapRetainCount parameter: Number of snapshots to retain
After understanding the execution parameters, let's analyze the purge method. The specific processing code is as follows:
public static void purge(File dataDir, File snapDir, int num) throws IOException {
  // Throw an exception if the number of snapshots to retain is less than 3
  if (num < 3) {
    throw new IllegalArgumentException(COUNT_ERR_MSG);
  }

  // Create FileTxnSnapLog object
  FileTxnSnapLog txnLog = new FileTxnSnapLog(dataDir, snapDir);

  // Get a certain number of files from the FileTxnSnapLog object
  List<File> snaps = txnLog.findNRecentSnapshots(num);
  // Get the number of files found
  int numSnaps = snaps.size();
  // If the number of files is greater than 0
  if (numSnaps > 0) {
    // Clean up snapshots
    purgeOlderSnapshots(txnLog, snaps.get(numSnaps - 1));
  }
}
The core process in the above code is as follows:
- Check if the number of files to retain is less than 3. If so, throw an exception.
- Create a FileTxnSnapLog object, then find a certain number of snapshot files from it. The search method is to first sort the files, then get the smallest num files, i.e., the num files with the smallest zxid.
- If the number of files found in step (2) is greater than 0, perform the cleanup operation.
The most crucial part in the above process is the purgeOlderSnapshots method. The specific processing code is as follows:
static void purgeOlderSnapshots(FileTxnSnapLog txnLog, File snapShot) {
  // Extract zxid from the snapshot file name
  final long leastZxidToBeRetain = Util.getZxidFromName(
    snapShot.getName(), PREFIX_SNAPSHOT);

  // Extract data before leastZxidToBeRetain from the txnLog parameter
  final Set<File> retainedTxnLogs = new HashSet<File>();
  retainedTxnLogs.addAll(Arrays.asList(txnLog.getSnapshotLogs(leastZxidToBeRetain)));

  // File filter
  class MyFileFilter implements FileFilter {
    private final String prefix;

    MyFileFilter(String prefix) {
      this.prefix = prefix;
    }

    public boolean accept(File f) {
      if (!f.getName().startsWith(prefix + "."))
        return false;
      if (retainedTxnLogs.contains(f)) {
        return false;
      }
      // zxid of the current file
      long fZxid = Util.getZxidFromName(f.getName(), prefix);
      // If the file's zxid is greater than or equal to the minimum value, it doesn't need to be deleted
      if (fZxid >= leastZxidToBeRetain) {
        return false;
      }
      return true;
    }
  }
  // Filter data files
  File[] logs = txnLog.getDataDir().listFiles(new MyFileFilter(PREFIX_LOG));
  List<File> files = new ArrayList<>();
  if (logs != null) {
    files.addAll(Arrays.asList(logs));
  }

  // Filter snapshot files
  File[] snapshots = txnLog.getSnapDir().listFiles(new MyFileFilter(PREFIX_SNAPSHOT));
  if (snapshots != null) {
    files.addAll(Arrays.asList(snapshots));
  }

  // Delete historical files
  for (File f : files) {
    final String msg = "Removing file: " +
      DateFormat.getDateTimeInstance().format(f.lastModified()) +
      "\t" + f.getPath();
    LOG.info(msg);
    System.out.println(msg);
    if (!f.delete()) {
      System.err.println("Failed to remove " + f.getPath());
    }
  }
}
The core processing flow in the above code is as follows:
- Retrieve the zxid from the snapshot file, denoted as the leastZxidToBeRetain variable.
- Extract files from the txnLog parameter with zxid before leastZxidToBeRetain and add them to the retainedTxnLogs set.
- Create a file filter, which is mainly used to compare zxid. The specific comparison details are as follows:
- Files not starting with "log." or "snapshot." are not filtered.
- Files not in the retainedTxnLogs set are not filtered.
- Files with zxid greater than or equal to leastZxidToBeRetain are not filtered.
- Retrieve data files and snapshot files from the txnLog parameter using the file filter created in step (3), then perform deletion operations on them.
ZooKeeperServerMain Startup Analysis
In the ZooKeeper project, ZooKeeperServerMain can be used to start the ZK service. Developers can complete the startup of the ZooKeeper server through the main method. The most crucial code in the main method is as follows:
ZooKeeperServerMain main = new ZooKeeperServerMain();
main.initializeAndRun(args);
In the above code, the first line is a direct object construction operation with few details. The focus is on the execution of the initializeAndRun method, detailed code as follows:
protected void initializeAndRun(String[] args)
  throws ConfigException, IOException, AdminServerException {
  try {
    // Register log4j and MBeanServer related information
    ManagedUtil.registerLog4jMBeans();
  } catch (JMException e) {
    LOG.warn("Unable to register log4j JMX control", e);
  }

  // Create ZooKeeper server configuration
  ServerConfig config = new ServerConfig();
  // Parse configuration
  if (args.length == 1) {
    config.parse(args[0]);
  } else {
    config.parse(args);
  }

  // Core run method
  runFromConfig(config);
}
The core processing flow in the above code is as follows:
- Create ZooKeeper server configuration and call the parse method to parse command-line arguments.
- Start ZooKeeper through the runFromConfig method and ZooKeeper server configuration.
Next, we analyze the server configuration parsing process. The specific processing code is as follows:
public void parse(String path) throws ConfigException {
  // Create ZooKeeper configuration class (quorum configuration class)
  QuorumPeerConfig config = new QuorumPeerConfig();
  // Parse configuration address
  config.parse(path);

  // Read configuration and set it to member variables
  readFrom(config);
}
In the above code, the configuration parsing is completed by the QuorumPeerConfig class. The specific parsing process is to convert the file path to a file object, then load the contents of the file through the Properties class. The loaded data information will be stored in the QuorumPeerConfig class. After completing the QuorumPeerConfig#parse method call, the readFrom method will be processed. This method extracts the configuration saved in the QuorumPeerConfig class and extracts it to the ServerConfig class. After the extraction is complete, the ServerConfig#parse method execution ends.
Next, we analyze the runFromConfig method. The goal of this method is to complete the startup of the ZooKeeper service. The specific processing code is as follows:
public void runFromConfig(ServerConfig config)
  throws IOException, AdminServerException {
  LOG.info("Starting server");
  // Transaction log and snapshot log
  FileTxnSnapLog txnLog = null;
  try {
    txnLog = new FileTxnSnapLog(config.dataLogDir, config.dataDir);
    // Create ZooKeeperServer class
    final ZooKeeperServer zkServer = new ZooKeeperServer(txnLog,
                                                         config.tickTime, config.minSessionTimeout, config.maxSessionTimeout, null,
                                                         QuorumPeerConfig.isReconfigEnabled());
    txnLog.setServerStats(zkServer.serverStats());

    final CountDownLatch shutdownLatch = new CountDownLatch(1);
    zkServer.registerServerShutdownHandler(
      new ZooKeeperServerShutdownHandler(shutdownLatch));

    adminServer = AdminServerFactory.createAdminServer();
    adminServer.setZooKeeperServer(zkServer);
    // Start the admin server
    adminServer.start();

    // Flag to determine if ZooKeeper service needs to be started, default is true
    boolean needStartZKServer = true;
    // If client address is not empty
    if (config.getClientPortAddress() != null) {
      // Create ServerCnxnFactory
      cnxnFactory = ServerCnxnFactory.createFactory();
      // Set configuration information
      cnxnFactory.configure(config.getClientPortAddress(), config.getMaxClientCnxns(),
                            false);
      // Start
      cnxnFactory.startup(zkServer);
      // Set the flag to false as ZooKeeper service is now started
      needStartZKServer = false;
    }
    // If secure client address is not empty
    if (config.getSecureClientPortAddress() != null) {
      // Create ServerCnxnFactory
      secureCnxnFactory = ServerCnxnFactory.createFactory();
      // Set configuration information
      secureCnxnFactory.configure(config.getSecureClientPortAddress(),
                                  config.getMaxClientCnxns(), true);
      // Start
      secureCnxnFactory.startup(zkServer, needStartZKServer);
    }

    // Create container manager
    containerManager =
      new ContainerManager(zkServer.getZKDatabase(), zkServer.firstProcessor,
                           Integer.getInteger("znode.container.checkIntervalMs",
                                              (int) TimeUnit.MINUTES.toMillis(1)),
                           Integer.getInteger("znode.container.maxPerMinute", 10000)
                          );
    // Start container manager
    containerManager.start();

    shutdownLatch.await();

    // Shutdown
    shutdown();


    if (cnxnFactory != null) {
      cnxnFactory.join();
    }
    if (secureCnxnFactory != null) {
      secureCnxnFactory.join();
    }
    if (zkServer.canShutdown()) {
      zkServer.shutdown(true);
    }
  } catch (InterruptedException e) {
    // warn, but generally this is ok
    LOG.warn("Server interrupted", e);
  } finally {
    if (txnLog != null) {
      // Close transaction log
      txnLog.close();
    }
  }
}
The core processing flow in the above code is as follows:
- Create a FileTxnSnapLog object, which is primarily used to store transaction logs (TxnLog) and snapshot logs (SnapShot).
- Create a ZooKeeperServer object.
- Set the status information of the ZooKeeperServer object in the FileTxnSnapLog object.
- Create a CountDownLatch object and register a shutdown handler (ZooKeeperServerShutdownHandler) to the ZooKeeperServer object. The shutdown handler depends on the CountDownLatch object.
- Create an AdminServer object, set the ZooKeeperServer object, and then execute the AdminServer#start method to start the AdminServer.
- Create a flag to determine if the ZooKeeper service needs to be started, with a default value of true. If the client address in the configuration is not empty, adjust this flag to false. Additionally, create a ServerCnxnFactory object, configure relevant information, and start it.
- If the secure client address in the configuration is not empty, create a ServerCnxnFactory object, configure relevant information, and start it.
- Create a container manager (ContainerManager) and start it.
- Wait for notification to perform shutdown operations. The notification is provided by the ZooKeeperServerShutdownHandler class. Shutdown content includes:
- Container manager (ContainerManager)
- Two ServerCnxnFactory instances, from steps (6) and (7)
- AdminServer service
- If cnxnFactory and secureCnxnFactory are not null, call their join methods.
- Check if the ZooKeeper service can be shut down, and if so, perform the shutdown operation.
ServerCnxnFactory Analysis
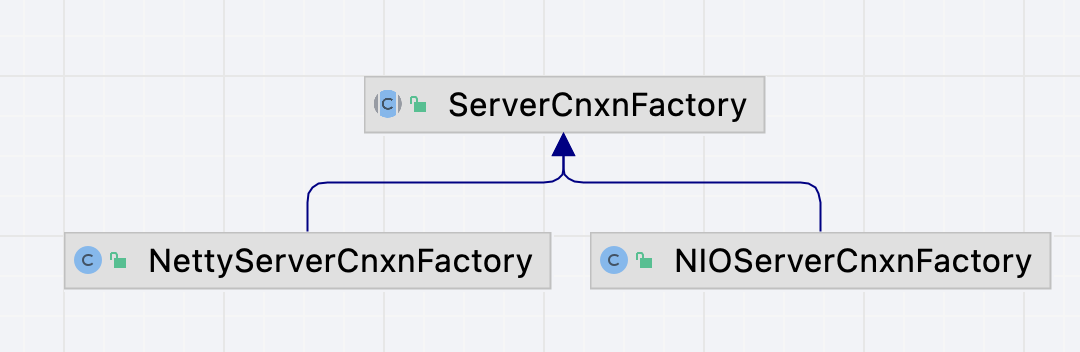
This section analyzes the ServerCnxnFactory class. In the ZooKeeper project, this class has two implementations:
- NettyServerCnxnFactory implementation, which is based on the Netty project.
- NIOServerCnxnFactory implementation, which is based on the native NIO implementation in JDK.
The class diagram of ServerCnxnFactory and its implementations is shown in the figure.
After understanding the implementations, we need to understand the member variables. The specific information is shown in the table.
| Variable Name | Variable Type | Variable Description |
|---|---|---|
| closeConn | ByteBuffer | Byte buffer used to determine if a connection should close |
| cnxns | Set<ServerCnxn> | Set of server connections |
| connectionBeans | ConcurrentHashMap<ServerCnxn, ConnectionBean> | Mapping between server connections and client connections |
| login | Login | Login information |
| secure | boolean | Whether SSL is enabled |
| saslServerCallbackHandler | SaslServerCallbackHandler | SASL server callback handler |
| zkServer | ZooKeeperServer | ZooKeeper server |
After understanding the member variables, let's provide a brief overview of the methods defined in the ServerCnxnFactory class.
- The createFactory method is used to create an implementation of the ServerCnxnFactory class.
- The getLocalPort method is used to retrieve the local port.
- The getConnections method is used to obtain the set of server connections.
- The getNumAliveConnections method is used to get the number of active (alive) server connections.
- The closeSession method is used to close a session.
- The configure method is used to configure data in the ServerCnxnFactory class.
- The reconfigure method is used to reload the configuration.
- The getMaxClientCnxnsPerHost method is used to get the maximum number of connections allowed for a specific host (IP).
- The setMaxClientCnxnsPerHost method is used to set the maximum number of connections allowed for a specific host (IP).
- Both startup and start methods are used for service initialization during the startup phase.
- The shutdown method is used to close various components, with different implementations closing different content.
- The closeAll method is used to close all server connections.
- The getLocalAddress method is used to get the local network address.
- The resetAllConnectionStats method is used to reset all server connection statistics.
- The getAllConnectionInfo method is used to get information about all server connections.
- The unregisterConnection method is used to unregister a server connection.
- The registerConnection method is used to register a server connection.
- The configureSaslLogin method is used to configure Sasl login information.
Now, let's explain the implemented methods in the ServerCnxnFactory class. First, we'll look at the createFactory method. The specific processing code is as follows:
static public ServerCnxnFactory createFactory() throws IOException {
  // ZooKeeper server connection factory class name
  String serverCnxnFactoryName =
    System.getProperty(ZOOKEEPER_SERVER_CNXN_FACTORY);
  // If the class name is empty, use NIOServerCnxnFactory class name
  if (serverCnxnFactoryName == null) {
    serverCnxnFactoryName = NIOServerCnxnFactory.class.getName();
  }
  try {
    // Create class using reflection
    ServerCnxnFactory serverCnxnFactory =
      (ServerCnxnFactory) Class.forName(serverCnxnFactoryName)
      .getDeclaredConstructor().newInstance();
    LOG.info("Using {} as server connection factory", serverCnxnFactoryName);
    return serverCnxnFactory;
  } catch (Exception e) {
    IOException ioe = new IOException("Couldn't instantiate "
                                      + serverCnxnFactoryName);
    ioe.initCause(e);
    throw ioe;
  }
}
The core processing flow in the above code is as follows:
- Retrieve the server connection factory class name from the environment variable zookeeper.serverCnxnFactory.
- If the factory class name is empty, use the class name of NIOServerCnxnFactory.
- Create the ServerCnxnFactory class using reflection and return it.
Next, let's analyze the registerConnection method for registering server connections. The specific processing code is as follows:
public void registerConnection(ServerCnxn serverCnxn) {
  // If ZooKeeper server is not null
  if (zkServer != null) {
    // Create a connection storage object
    ConnectionBean jmxConnectionBean = new ConnectionBean(serverCnxn, zkServer);
    try {
      // Register the instance
      MBeanRegistry.getInstance().register(jmxConnectionBean, zkServer.jmxServerBean);
      // Add to the container
      connectionBeans.put(serverCnxn, jmxConnectionBean);
    } catch (JMException e) {
      LOG.warn("Could not register connection", e);
    }
  }

}
The core processing flow in the above code is as follows:
- Check if the ZooKeeper server is null. If it's null, no processing is done.
- Create a storage object for the connection and ZooKeeper server.
- Perform registration using the MBeanRegistry class.
- Add the data to the connectionBeans container.
Next, let's analyze the unregisterConnection method for unregistering server connections. The specific processing code is as follows:
public void unregisterConnection(ServerCnxn serverCnxn) {
  ConnectionBean jmxConnectionBean = connectionBeans.remove(serverCnxn);
  if (jmxConnectionBean != null) {
    MBeanRegistry.getInstance().unregister(jmxConnectionBean);
  }
}
The core processing flow in the above code is as follows:
- Remove the data corresponding to the server connection from the connectionBeans container.
- Delete the corresponding data from the MBeanRegistry.
Finally, let's analyze the configureSaslLogin method. The specific processing code is as follows:
protected void configureSaslLogin() throws IOException {
  // Get the data corresponding to zookeeper.sasl.serverconfig from the system environment, default is Server
  String serverSection = System.getProperty(ZooKeeperSaslServer.LOGIN_CONTEXT_NAME_KEY,
                                            ZooKeeperSaslServer.DEFAULT_LOGIN_CONTEXT_NAME);
  // Application configuration entries
  AppConfigurationEntry entries[] = null;
  SecurityException securityException = null;
  try {
    // Get AppConfigurationEntries properties
    entries = Configuration.getConfiguration().getAppConfigurationEntry(serverSection);
  } catch (SecurityException e) {
    securityException = e;
  }

  // If application configuration entries are empty
  if (entries == null) {
    // Read system variable java.security.auth.login.config
    String jaasFile = System.getProperty(Environment.JAAS_CONF_KEY);
    // Read system variable zookeeper.sasl.serverconfig
    String loginContextName =
      System.getProperty(ZooKeeperSaslServer.LOGIN_CONTEXT_NAME_KEY);
    // If exception object is not null
    // And system variable zookeeper.sasl.serverconfig is not empty or java.security.auth.login.config connection is not empty
    if (securityException != null && (loginContextName != null || jaasFile != null)) {
      String errorMessage =
        "No JAAS configuration section named '" + serverSection + "' was found";
      if (jaasFile != null) {
        errorMessage += " in '" + jaasFile + "'.";
      }
      if (loginContextName != null) {
        errorMessage +=
          " But " + ZooKeeperSaslServer.LOGIN_CONTEXT_NAME_KEY + " was set.";
      }
      LOG.error(errorMessage);
      throw new IOException(errorMessage);
    }
    // End processing
    return;
  }

  // jaas.conf entry available
  try {
    // Create member variables saslServerCallbackHandler and login, and start the thread in the login variable
    saslServerCallbackHandler =
      new SaslServerCallbackHandler(Configuration.getConfiguration());
    login = new Login(serverSection, saslServerCallbackHandler, new ZKConfig());
    login.startThreadIfNeeded();
  } catch (LoginException e) {
    throw new IOException(
      "Could not configure server because SASL configuration did not allow the "
      + " ZooKeeper server to authenticate itself properly: " + e);
  }
}
The core processing flow in the above code is as follows:
- Retrieve the data corresponding to zookeeper.sasl.serverconfig from the system environment, with the default value being "Server".
- Get the AppConfigurationEntry data collection from the configuration (javax.security.auth.login.Configuration). If an exception occurs during retrieval, store the exception information in the securityException variable.
- If the AppConfigurationEntry data collection is empty, perform the following operations:
- Read the system variables java.security.auth.login.config and zookeeper.sasl.serverconfig.
- If the exception object from step (2) is not null and either the system variable zookeeper.sasl.serverconfig is not empty or the java.security.auth.login.config connection is not empty, throw an exception.
- Create member variables saslServerCallbackHandler and login, and start the thread in the login variable.
Analysis of SaslServerCallbackHandler
This section will analyze the SaslServerCallbackHandler class. In the ServerCnxnFactory class, the SaslServerCallbackHandler class is initialized. The specific constructor code is as follows:
public SaslServerCallbackHandler(Configuration configuration)
  throws IOException {
  // Read system variable zookeeper.sasl.serverconfig, default value is Server
  String serverSection = System.getProperty(
    ZooKeeperSaslServer.LOGIN_CONTEXT_NAME_KEY,
    ZooKeeperSaslServer.DEFAULT_LOGIN_CONTEXT_NAME);
  // Get AppConfigurationEntry collection corresponding to serverSection
  AppConfigurationEntry[] configurationEntries =
    configuration.getAppConfigurationEntry(serverSection);

  // Throw an exception if AppConfigurationEntry collection is empty
  if (configurationEntries == null) {
    String errorMessage = "Could not find a '" + serverSection
      + "' entry in this configuration: Server cannot start.";
    LOG.error(errorMessage);
    throw new IOException(errorMessage);
  }
  // Clear the credential container
  credentials.clear();
  // Loop through AppConfigurationEntry collection
  for (AppConfigurationEntry entry : configurationEntries) {
    Map<String, ?> options = entry.getOptions();
    for (Map.Entry<String, ?> pair : options.entrySet()) {
      String key = pair.getKey();
      // If data information starts with user_, put it into the credential container
      if (key.startsWith(USER_PREFIX)) {
        String userName = key.substring(USER_PREFIX.length());
        credentials.put(userName, (String) pair.getValue());
      }
    }
  }
}
The core processing flow in the above code is as follows:
- Retrieve the data corresponding to zookeeper.sasl.serverconfig from the system environment, with a default value of "Server".
- Get the AppConfigurationEntry collection corresponding to serverSection from the configuration parameter.
- Throw an exception if the AppConfigurationEntry collection is empty.
- Clear the credential container (credentials).
- Loop through the AppConfigurationEntry collection. If a data key starts with "user_", it will be split, keeping the data after "user_" as the key, and putting the value data into the credential container (credentials).
The above operation flow details the constructor. Next, we'll analyze the callback method. The method responsible for handling is 'handle', and the specific processing code is as follows:
public void handle(Callback[] callbacks) throws UnsupportedCallbackException {
  for (Callback callback : callbacks) {
    if (callback instanceof NameCallback) {
      handleNameCallback((NameCallback) callback);
    } else if (callback instanceof PasswordCallback) {
      handlePasswordCallback((PasswordCallback) callback);
    } else if (callback instanceof RealmCallback) {
      handleRealmCallback((RealmCallback) callback);
    } else if (callback instanceof AuthorizeCallback) {
      handleAuthorizeCallback((AuthorizeCallback) callback);
    }
  }
}
In the above code, the callback collection parameter is looped through, and operations are performed according to different callback collection types. If the callback type is NameCallback, the handleNameCallback method will be called for processing. The specific processing code is as follows:
private void handleNameCallback(NameCallback nc) {
  if (credentials.get(nc.getDefaultName()) == null) {
    LOG.warn("User '" + nc.getDefaultName()
             + "' not found in list of DIGEST-MD5 authenticateable users.");
    return;
  }
  nc.setName(nc.getDefaultName());
  userName = nc.getDefaultName();
}
In the above code, it checks whether there is a certificate corresponding to the defaultName variable in the credential container. If it doesn't exist, the processing is skipped. If it exists, the defaultName variable needs to be put into the name variable of the parameter, and the member variable username needs to be set to the defaultName variable value.
If the callback type is PasswordCallback, the handlePasswordCallback method will be called for processing. The specific processing code is as follows:
private void handlePasswordCallback(PasswordCallback pc) {
  if ("super".equals(this.userName) && System.getProperty(SYSPROP_SUPER_PASSWORD) != null) {
    pc.setPassword(System.getProperty(SYSPROP_SUPER_PASSWORD).toCharArray());
  } else if (credentials.containsKey(userName)) {
    pc.setPassword(credentials.get(userName).toCharArray());
  } else {
    LOG.warn("No password found for user: " + userName);
  }
}
The core processing flow in the above code is as follows:
- If the member variable userName is "super" and the zookeeper.SASLAuthenticationProvider.superPassword property in the system environment is not empty, the password of the parameter pc needs to be set. The data set is the zookeeper.SASLAuthenticationProvider.superPassword property in the system environment.
- If there is a certificate corresponding to userName in the credential container, the certificate needs to be converted and put into the password property of the parameter pc.
- In other cases, a warning log is output.
If the callback type is RealmCallback, the handleRealmCallback method will be called for processing. The specific processing code is as follows:
private void handleRealmCallback(RealmCallback rc) {
  LOG.debug("client supplied realm: " + rc.getDefaultText());
  rc.setText(rc.getDefaultText());
}
The core of the above code is to set the defaultText property of the parameter to the inputText property. Finally, if the callback type is AuthorizeCallback, the handleAuthorizeCallback method will be called for processing. The specific processing code is as follows:
private void handleAuthorizeCallback(AuthorizeCallback ac) {
  // Get authentication ID
  String authenticationID = ac.getAuthenticationID();
  // Get authorization ID
  String authorizationID = ac.getAuthorizationID();

  LOG.info("Successfully authenticated client: authenticationID=" + authenticationID
           + ";  authorizationID=" + authorizationID + ".");
  // Set authorization to allowed
  ac.setAuthorized(true);
  // Create KerberosName object
  KerberosName kerberosName = new KerberosName(authenticationID);
  try {
    // Construct username, initialize value: short name
    StringBuilder userNameBuilder = new StringBuilder(kerberosName.getShortName());
    // Check if host needs to be appended, if so, append it
    if (shouldAppendHost(kerberosName)) {
      userNameBuilder.append("/").append(kerberosName.getHostName());
    }
    // Check if realm needs to be appended
    if (shouldAppendRealm(kerberosName)) {
      userNameBuilder.append("@").append(kerberosName.getRealm());
    }
    LOG.info("Setting authorizedID: " + userNameBuilder);
    // Set authorization ID
    ac.setAuthorizedID(userNameBuilder.toString());
  } catch (IOException e) {
    LOG.error("Failed to set name based on Kerberos authentication rules.", e);
  }
}
The core of the above code is to set data for the authentication callback object. The specific processing flow is as follows:
- Retrieve the authentication ID and authorization ID from the parameters.
- Set whether to allow authorization to the allowed state.
- Create a KerberosName object.
- Construct username information, and after construction, set it to the authorizedID property. The construction process is as follows:
- Add the short name from the KerberosName object to the string, placing it at the beginning.
- Determine whether the host needs to be appended. If needed, append it, using a slash as a separator.
- Determine whether the realm needs to be appended. If needed, append it, using the @ symbol as a separator.
Login Analysis
This section analyzes the Login class, which is primarily a thread. This class is implemented based on various security interfaces and classes from the javax.security.auth package. The thread construction occurs in the constructor, and it's important to note that this is a daemon thread. The specific execution code for this thread is as follows:
new Thread(new Runnable() {
  public void run() {
    LOG.info("TGT refresh thread started.");
    while (true) {
      // Get KerberosTicket
      KerberosTicket tgt = getTGT();
      // Get current time
      long now = Time.currentWallTime();
      // Next refresh time
      long nextRefresh;
      Date nextRefreshDate;
      // If tgt variable is null, recalculate time
      if (tgt == null) {
        nextRefresh = now + MIN_TIME_BEFORE_RELOGIN;
        nextRefreshDate = new Date(nextRefresh);
        LOG.warn("No TGT found: will try again at {}", nextRefreshDate);
      }
      else {
        // Calculate next refresh time based on tgt
        nextRefresh = getRefreshTime(tgt);
        // Calculate expiry time
        long expiry = tgt.getEndTime().getTime();
        Date expiryDate = new Date(expiry);
        // Using Ticket cache,
        // tgt's endTime and renewTill are the same
        if ((isUsingTicketCache) && (tgt.getEndTime().equals(tgt.getRenewTill()))) {
          Object[] logPayload = {expiryDate, principal, principal};
          LOG.error("The TGT cannot be renewed beyond the next expiry date: {}." +
                    "This process will not be able to authenticate new SASL connections after that "
                    +
                    "time (for example, it will not be authenticate a new connection with a Zookeeper "
                    +
                    "Quorum member).  Ask your system administrator to either increase the "
                    +
                    "'renew until' time by doing : 'modprinc -maxrenewlife {}' within "
                    +
                    "kadmin, or instead, to generate a keytab for {}. Because the TGT's "
                    +
                    "expiry cannot be further extended by refreshing, exiting refresh thread now.",
                    logPayload);
          return;
        }
        // Next refresh time is greater than expiry time
        // Current time + minimum relogin time is greater than expiry time
        if ((nextRefresh > expiry) ||
            ((now + MIN_TIME_BEFORE_RELOGIN) > expiry)) {
          nextRefresh = now;
        }
        else {
          // Next refresh time is less than current time + minimum relogin time
          if (nextRefresh < (now + MIN_TIME_BEFORE_RELOGIN)) {
            Date until = new Date(nextRefresh);
            Date newuntil = new Date(now + MIN_TIME_BEFORE_RELOGIN);
            Object[] logPayload =
            {until, newuntil, (MIN_TIME_BEFORE_RELOGIN / 1000)};
            LOG.warn("TGT refresh thread time adjusted from : {} to : {} since "
                     + "the former is sooner than the minimum refresh interval ("
                     + "{} seconds) from now.", logPayload);
          }
          // Calculate next refresh time
          nextRefresh = Math.max(nextRefresh, now + MIN_TIME_BEFORE_RELOGIN);
        }
        // Create next refresh time (Date type)
        nextRefreshDate = new Date(nextRefresh);
        // If next refresh time is greater than expiry time
        if (nextRefresh > expiry) {
          Object[] logPayload = {nextRefreshDate, expiryDate};
          LOG.error("next refresh: {} is later than expiry {}."
                    + " This may indicate a clock skew problem. Check that this host and the KDC's "
                    + "hosts' clocks are in sync. Exiting refresh thread.",
                    logPayload);
          return;
        }
      }
      // Current time equals next refresh time
      if (now == nextRefresh) {
        LOG.info(
          "refreshing now because expiry is before next scheduled refresh time.");
      }
      // Current time is less than next refresh time
      else if (now < nextRefresh) {
        Date until = new Date(nextRefresh);
        LOG.info("TGT refresh sleeping until: {}", until.toString());
        try {
          // Wait for a certain time
          Thread.sleep(nextRefresh - now);
        } catch (InterruptedException ie) {
          LOG.warn("TGT renewal thread has been interrupted and will exit.");
          break;
        }
      }
      // Skip if greater
      else {
        LOG.error("nextRefresh:{} is in the past: exiting refresh thread. Check"
                  + " clock sync between this host and KDC - (KDC's clock is likely ahead of this host)."
                  + " Manual intervention will be required for this client to successfully authenticate."
                  + " Exiting refresh thread.", nextRefreshDate);
        break;
      }
      // Using Ticket cache
      if (isUsingTicketCache) {
        // Get zookeeper.kinit property, default value: /usr/bin/kinit
        String cmd =
          zkConfig.getProperty(ZKConfig.KINIT_COMMAND, KINIT_COMMAND_DEFAULT);
        String kinitArgs = "-R";
        int retry = 1;
        // Execute shell command within retry range
        while (retry >= 0) {
          try {
            LOG.debug("running ticket cache refresh command: {} {}", cmd,
                      kinitArgs);
            Shell.execCommand(cmd, kinitArgs);
            break;
          } catch (Exception e) {
            if (retry > 0) {
              --retry;
              // sleep for 10 seconds
              try {
                Thread.sleep(10 * 1000);
              } catch (InterruptedException ie) {
                LOG.error(
                  "Interrupted while renewing TGT, exiting Login thread");
                return;
              }
            } else {
              Object[] logPayload = {cmd, kinitArgs, e.toString(), e};
              LOG.warn(
                "Could not renew TGT due to problem running shell command: '{}"
                + " {}'; exception was:{}. Exiting refresh thread.",
                logPayload);
              return;
            }
          }
        }
      }
      try {
        int retry = 1;
        // Perform relogin operation within retry count range
        while (retry >= 0) {
          try {
            reLogin();
            break;
          } catch (LoginException le) {
            if (retry > 0) {
              --retry;
              // sleep for 10 seconds.
              try {
                Thread.sleep(10 * 1000);
              } catch (InterruptedException e) {
                LOG.error(
                  "Interrupted during login retry after LoginException:",
                  le);
                throw le;
              }
            } else {
              LOG.error("Could not refresh TGT for principal: {}.", principal,
                        le);
            }
          }
        }
      } catch (LoginException le) {
        LOG.error("Failed to refresh TGT: refresh thread exiting now.", le);
        break;
      }
    }
  }
})
The core processing flow in the above code is as follows:
- Obtain a KerberosTicket object using the getTGT method, storing it in the tgt variable.
- Get the current time.
- Create storage variables for the next refresh time (nextRefresh, nextRefreshDate).
- If the tgt variable is null, update the next refresh time. The calculation rule is: current time + minimum relogin time. Otherwise, calculate the next refresh time as follows:
- Use the getRefreshTime method to calculate the next refresh time.
- Calculate the expiry time based on tgt.
- If using Ticket cache and tgt's endTime and renewTill are the same, log an error and end processing.
- If the next refresh time is greater than the expiry time or the current time + minimum relogin time is greater than the expiry time, set the next refresh time to the current time. If not, take the larger value between nextRefresh and current time + minimum relogin time as the next refresh time.
- If the next refresh time is greater than the expiry time, log an error and end processing.
- If the current time equals the next refresh time, log the information without further processing.
- If the current time is less than the next refresh time, perform thread waiting. The wait time is: next refresh time - current time.
- If the current time is greater than the next refresh time, skip processing.
- If using Ticket cache, get the zookeeper.kinit property from the ZK configuration (default value is /usr/bin/kinit), then process the shell command within the allowed retry count range.
- Perform relogin operations (execute the reLogin method) within the retry count range.
Analysis of NettyServerCnxnFactory
This section analyzes the NettyServerCnxnFactory class, which is an implementation of the ServerCnxnFactory class based on the Netty framework. The focus will be on analyzing the constructor, with the specific implementation code as follows:
NettyServerCnxnFactory() {
  x509Util = new ClientX509Util();

  boolean usePortUnification = Boolean.getBoolean(PORT_UNIFICATION_KEY);
  LOG.info("{}={}", PORT_UNIFICATION_KEY, usePortUnification);
  if (usePortUnification) {
    try {
      QuorumPeerConfig.configureSSLAuth();
    } catch (QuorumPeerConfig.ConfigException e) {
      LOG.error("unable to set up SslAuthProvider, turning off client port unification",
                e);
      usePortUnification = false;
    }
  }
  this.shouldUsePortUnification = usePortUnification;

  EventLoopGroup bossGroup = NettyUtils.newNioOrEpollEventLoopGroup(
    NettyUtils.getClientReachableLocalInetAddressCount());
  EventLoopGroup workerGroup = NettyUtils.newNioOrEpollEventLoopGroup();
  ServerBootstrap bootstrap = new ServerBootstrap()
    .group(bossGroup, workerGroup)
    .channel(NettyUtils.nioOrEpollServerSocketChannel())
    // parent channel options
    .option(ChannelOption.SO_REUSEADDR, true)
    // child channels options
    .childOption(ChannelOption.TCP_NODELAY, true)
    .childOption(ChannelOption.SO_LINGER, -1)
    .childHandler(new ChannelInitializer<SocketChannel>() {
      @Override
      protected void initChannel(SocketChannel ch) throws Exception {
        ChannelPipeline pipeline = ch.pipeline();
        if (secure) {
          initSSL(pipeline, false);
        } else if (shouldUsePortUnification) {
          initSSL(pipeline, true);
        }
        pipeline.addLast("servercnxnfactory", channelHandler);
      }
    });
  this.bootstrap = configureBootstrapAllocator(bootstrap);
  this.bootstrap.validate();
}
The core of the above code is to initialize various member variables. Pay attention to the bossGroup and workerGroup variables, which can be of two specific types: EpollEventLoopGroup and NioEventLoopGroup. In the constructor, it's also important to focus on the initialization of the bootstrap variable. The most crucial part of this initialization is the SSL-related processing, which involves adding some ChannelHandler interface implementations. The processing method is initSSL, with the specific implementation code as follows:
private synchronized void initSSL(ChannelPipeline p, boolean supportPlaintext)
  throws X509Exception, KeyManagementException, NoSuchAlgorithmException {
  // Get the zookeeper.ssl.authProvider property
  String authProviderProp = System.getProperty(x509Util.getSslAuthProviderProperty());
  // SSL context
  SslContext nettySslContext;
  // If zookeeper.ssl.authProvider property is null
  if (authProviderProp == null) {
    // Get the default SSL context and options
    SSLContextAndOptions sslContextAndOptions = x509Util.getDefaultSSLContextAndOptions();
    // Create SSL context
    nettySslContext = sslContextAndOptions.createNettyJdkSslContext(
      sslContextAndOptions.getSSLContext(), false);
  }
  // If zookeeper.ssl.authProvider property is not null
  else {
    // Get SSL context for TLSv1.2
    SSLContext sslContext = SSLContext.getInstance(ClientX509Util.DEFAULT_PROTOCOL);
    // Get authentication provider
    X509AuthenticationProvider authProvider =
      (X509AuthenticationProvider) ProviderRegistry.getProvider(
      System.getProperty(x509Util.getSslAuthProviderProperty(), "x509"));

    // Throw exception if authentication provider is null
    if (authProvider == null) {
      LOG.error("Auth provider not found: {}", authProviderProp);
      throw new SSLContextException(
        "Could not create SSLContext with specified auth provider: " +
        authProviderProp);
    }

    // Initialize SSL context
    sslContext.init(new X509KeyManager[]{authProvider.getKeyManager()},
                    new X509TrustManager[]{authProvider.getTrustManager()},
                    null);
    // Assign SSL context
    nettySslContext = x509Util.getDefaultSSLContextAndOptions()
      .createNettyJdkSslContext(sslContext, false);
  }

  // Support plaintext
  if (supportPlaintext) {
    p.addLast("ssl", new DualModeSslHandler(nettySslContext));
    LOG.debug("dual mode SSL handler added for channel: {}", p.channel());
  }
  else {
    p.addLast("ssl", nettySslContext.newHandler(p.channel().alloc()));
    LOG.debug("SSL handler added for channel: {}", p.channel());
  }
}
The core processing flow in the above code is as follows:
- Get the zookeeper.ssl.authProvider property from system variables.
- Create an SSL context, without specific data at this point.
- If the zookeeper.ssl.authProvider property is null, create the SSL context using the default method and assign it to the variable from step (2). Otherwise, create the SSL context through the following operations and assign it to the variable from step (2):
- Get the SSL context for TLSv1.2 using the SSL context instance.
- Get the authentication provider; if it's null, throw an exception.
- Initialize the TLSv1.2 SSL context.
- Wrap the TLSv1.2 SSL context and assign it to the SSL context.
- Check if plaintext is supported. If so, add a DualModeSslHandler; otherwise, add an SslHandler.
Analysis of NIOServerCnxnFactory
This section analyzes the NIOServerCnxnFactory class. The focus is on the following four thread classes:
- AbstractSelectThread class: The parent class of AcceptThread and SelectorThread, storing common data information.
- AcceptThread class: Used for receiving information.
- SelectorThread class: Used for selecting work pools for data processing.
- ConnectionExpirerThread class: Used for closing expired connections.
First, let's analyze the AcceptThread class. The entry point to focus on is the run method, with the specific implementation code as follows:
public void run() {
  try {
    while (!stopped && !acceptSocket.socket().isClosed()) {
      try {
        select();
      } catch (RuntimeException e) {
        LOG.warn("Ignoring unexpected runtime exception", e);
      } catch (Exception e) {
        LOG.warn("Ignoring unexpected exception", e);
      }
    }
  } finally {
    closeSelector();
    // This will wake up the selector threads, and tell the
    // worker thread pool to begin shutdown.
    if (!reconfiguring) {
      NIOServerCnxnFactory.this.stop();
    }
    LOG.info("accept thread exitted run method");
  }
}
The core of the above code is to call the select method through a loop. The specific implementation code is as follows:
private void select() {
  try {
    selector.select();

    Iterator<SelectionKey> selectedKeys =
      selector.selectedKeys().iterator();
    while (!stopped && selectedKeys.hasNext()) {
      SelectionKey key = selectedKeys.next();
      selectedKeys.remove();

      if (!key.isValid()) {
        continue;
      }
      if (key.isAcceptable()) {
        if (!doAccept()) {
          pauseAccept(10);
        }
      } else {
        LOG.warn("Unexpected ops in accept select "
                 + key.readyOps());
      }
    }
  } catch (IOException e) {
    LOG.warn("Ignoring IOException while selecting", e);
  }
}
The core of the above code is also processing through a loop. Apart from the loop, the overall core processing method is doAccept, which is the core of the AcceptThread class. The specific implementation code is as follows:
private boolean doAccept() {
  // Whether processed
  boolean accepted = false;
  // Socket channel
  SocketChannel sc = null;
  try {
    // Open a socket channel
    sc = acceptSocket.accept();
    // Mark as processed
    accepted = true;
    // Get network address
    InetAddress ia = sc.socket().getInetAddress();
    // Get the number of client connections
    int cnxncount = getClientCnxnCount(ia);

    // If the maximum number of client connections is greater than 0
    // and the number of client connections is greater than the maximum
    if (maxClientCnxns > 0 && cnxncount >= maxClientCnxns) {
      throw new IOException("Too many connections from " + ia
                            + " - max is " + maxClientCnxns);
    }

    LOG.debug("Accepted socket connection from "
              + sc.socket().getRemoteSocketAddress());
    sc.configureBlocking(false);

    // Get a selector thread for processing
    if (!selectorIterator.hasNext()) {
      selectorIterator = selectorThreads.iterator();
    }
    SelectorThread selectorThread = selectorIterator.next();
    // Process the socket channel, throw an exception if processing fails
    if (!selectorThread.addAcceptedConnection(sc)) {
      throw new IOException(
        "Unable to add connection to selector queue"
        + (stopped ? " (shutdown in progress)" : ""));
    }
    acceptErrorLogger.flush();
  } catch (IOException e) {
    acceptErrorLogger.rateLimitLog(
      "Error accepting new connection: " + e.getMessage());
    fastCloseSock(sc);
  }
  return accepted;
}
The core processing flow in the above code is as follows:
- Create a flag indicating whether the processing is successful, initially set to false, indicating failure.
- Create a socket channel storage variable named sc.
- Open a socket channel through the member variable acceptSocket.
- Set the processing success flag to true, indicating successful processing.
- Obtain the network address from the sc variable and get the number of client connections corresponding to the network address. If both of the following conditions are met, an exception is thrown indicating too many connections:
- The maximum number of client connections is greater than 0.
- The number of client connections exceeds the maximum number of client connections.
- In the selector iterator, obtain the next selector thread each time and execute the addAcceptedConnection method for processing. If processing fails, an exception is thrown.
Through the above analysis, we can see that in the AcceptThread class, SocketChannel type data is passed to the SelectorThread class for processing. Next, we'll analyze the addAcceptedConnection method. The specific processing code is as follows:
public boolean addAcceptedConnection(SocketChannel accepted) {
  if (stopped || !acceptedQueue.offer(accepted)) {
    return false;
  }
  wakeupSelector();
  return true;
}
The core of the above code is to add the parameter accepted to the acceptedQueue container. The SelectorThread class is a thread class, and the core processing logic is in the run method. The specific processing code is as follows:
public void run() {
  try {
    while (!stopped) {
      try {
        select();
        processAcceptedConnections();
        processInterestOpsUpdateRequests();
      } catch (RuntimeException e) {
        LOG.warn("Ignoring unexpected runtime exception", e);
      } catch (Exception e) {
        LOG.warn("Ignoring unexpected exception", e);
      }
    }
    for (SelectionKey key : selector.keys()) {
      NIOServerCnxn cnxn = (NIOServerCnxn) key.attachment();
      if (cnxn.isSelectable()) {
        cnxn.close();
      }
      cleanupSelectionKey(key);
    }
    SocketChannel accepted;
    while ((accepted = acceptedQueue.poll()) != null) {
      fastCloseSock(accepted);
    }
    updateQueue.clear();
  } finally {
    closeSelector();
    NIOServerCnxnFactory.this.stop();
    LOG.info("selector thread exitted run method");
  }
}
The core processing flow in the above code is as follows:
- Perform IO processing through the select method.
- Process data in the acceptedQueue.
- Process data in the updateQueue.
- Close the connection objects corresponding to the key set in the selector container.
- Close the channels in the acceptedQueue container.
In the above processing flow, the focus is on the IO processing of the select method. The specific processing code is as follows:
private void select() {
  try {
    selector.select();

    Set<SelectionKey> selected = selector.selectedKeys();
    ArrayList<SelectionKey> selectedList =
      new ArrayList<SelectionKey>(selected);
    Collections.shuffle(selectedList);
    Iterator<SelectionKey> selectedKeys = selectedList.iterator();
    while (!stopped && selectedKeys.hasNext()) {
      SelectionKey key = selectedKeys.next();
      selected.remove(key);

      if (!key.isValid()) {
        cleanupSelectionKey(key);
        continue;
      }
      if (key.isReadable() || key.isWritable()) {
        handleIO(key);
      } else {
        LOG.warn("Unexpected ops in select " + key.readyOps());
      }
    }
  } catch (IOException e) {
    LOG.warn("Ignoring IOException while selecting", e);
  }
}
In the above code, the core processing flow relies on a while loop. The key method within the loop is handleIO, and its processing code is as follows:
private void handleIO(SelectionKey key) {
  IOWorkRequest workRequest = new IOWorkRequest(this, key);
  NIOServerCnxn cnxn = (NIOServerCnxn) key.attachment();
  cnxn.disableSelectable();
  key.interestOps(0);
  touchCnxn(cnxn);
  workerPool.schedule(workRequest);
}
At this point, we have found the core of the core. In the above code, a specific instance of the IOWorkRequest class is handed over to the WorkerService class for request processing. In the WorkerService class, the specific processing is done by the doWork method in the IOWorkRequest parameter. The specific processing code is as follows:
public void doWork() throws InterruptedException {
    if (!key.isValid()) {
        selectorThread.cleanupSelectionKey(key);
        return;
    }

    if (key.isReadable() || key.isWritable()) {
        cnxn.doIO(key);

        if (stopped) {
            cnxn.close();
            return;
        }
        if (!key.isValid()) {
            selectorThread.cleanupSelectionKey(key);
            return;
        }
        touchCnxn(cnxn);
    }

    cnxn.enableSelectable();
    if (!selectorThread.addInterestOpsUpdateRequest(key)) {
        cnxn.close();
    }
}
In this code, it becomes clear that the core of handling IO operations is ultimately the NIOServerCnxn class. Finally, we analyze the ConnectionExpirerThread method, specifically the run method. The specific processing code is as follows:
public void run() {
  try {
    while (!stopped) {
      long waitTime = cnxnExpiryQueue.getWaitTime();
      if (waitTime > 0) {
        Thread.sleep(waitTime);
        continue;
      }
      for (NIOServerCnxn conn : cnxnExpiryQueue.poll()) {
        conn.close();
      }
    }

  } catch (InterruptedException e) {
    LOG.info("ConnnectionExpirerThread interrupted");
  }
}
In the above code, processing is done using a while loop. The processing flow for a single loop iteration is as follows:
- Get the wait time from the member variable cnxnExpiryQueue. If the wait time is greater than 0, wait for that duration and then continue to the next iteration.
- Close connections from cnxnExpiryQueue.
ServerCnxn Analysis
This section will analyze the ServerCnxn class. In ZooKeeper, there are two implementations of the ServerCnxn class:
- NettyServerCnxn based on Netty implementation
- NIOServerCnxn based on JDK NIO implementation
For the analysis of the ServerCnxn class, we mainly focus on two parts. The first part is the introduction of member variables, with specific information shown in the table:
| Variable Name | Variable Type | Variable Description |
|---|---|---|
| fourBytes | byte[] | Four-byte variable |
| established | Date | Connection creation time |
| packetsReceived | AtomicLong | Number of received packets |
| packetsSent | AtomicLong | Number of sent packets |
| authInfo | ArrayList<Id> | Authentication information collection |
| zooKeeperSaslServer | ZooKeeperSaslServer | SASL service |
| minLatency | long | Minimum latency |
| maxLatency | long | Maximum latency |
| lastOp | String | Last operation type |
| lastCxid | long | Client operation sequence number |
| lastZxid | long | Last zxid |
| lastResponseTime | long | Last response time |
| lastLatency | long | Last latency |
| count | long | Request processing count |
| totalLatency | long | Total latency |
| isOldClient | boolean | Whether it's an old client |
The second part is the method description. Some of the methods implemented in the ServerCnxn class come from the Stats interface and the Watcher interface. These methods are as follows:
- getSessionTimeout method: Get session timeout
- setSessionTimeout method: Set session timeout
- close method: Close the service
- sendResponse method: Send response
- sendCloseSession method: Send close session information
- process method: Process observer events
- getSessionId method: Get session ID
- setSessionId method: Set session ID
- getAuthInfo method: Get ID (authentication) information
- addAuthInfo method: Add ID (authentication) information
- removeAuthInfo method: Remove ID (authentication) information
- sendBuffer method: Send byte data
- enableRecv method: Resume data reception
- disableRecv method: Disable data reception
- packetReceived method: Receive data packet
- packetSent method: Send data packet
- serverStats method: Get server statistics
- resetStats method: Reset server statistics
- incrPacketsReceived method: Increment received packet count
- incrOutstandingRequests method: Increase the number of outstanding requests
- incrPacketsSent method: Increment sent packet count
- updateStatsForResponse method: Update statistics during response phase
- getEstablished method: Get connection creation time
- getOutstandingRequests method: Get the number of outstanding requests
- getPacketsReceived method: Get the number of processed data packets
- getPacketsSent method: Get the number of sent data packets
- getMinLatency method: Get minimum latency
- getAvgLatency method: Get average latency
- getMaxLatency method: Get maximum latency
- getLastOperation method: Get the last operation type
- getLastCxid method: Get client operation sequence number
- getLastZxid method: Get the last zxid
- getLastResponseTime method: Get the last response time
- getLastLatency method: Get the last latency
- getRemoteSocketAddress method: Get remote socket address
- getInterestOps method: Get feasible operations
- isSecure method: Check if SASL is enabled
- getClientCertificateChain method: Get certificate
- setClientCertificateChain method: Set certificate
- dumpConnectionInfo method: Output connection information
- getConnectionInfo method: Get connection information
- cleanupWriterSocket method: Clean up output object
Among the above methods, the getConnectionInfo method and dumpConnectionInfo method rely on other methods to complete their specific implementations.
AdminServer Analysis
This section analyzes the AdminServer interface, which is used for management services. The core implementation class is JettyAdminServer. Let's first introduce the definition of the AdminServer interface. The definition code is as follows:
@InterfaceAudience.Public
public interface AdminServer {
    /**
    * Start
    */
  void start() throws AdminServerException;

  /**
    * Shutdown
    */
  void shutdown() throws AdminServerException;

  /**
    * Set ZooKeeper server
    */
  void setZooKeeperServer(ZooKeeperServer zkServer);

  @InterfaceAudience.Public
  class AdminServerException extends Exception {
      private static final long serialVersionUID = 1L;

      public AdminServerException(String message, Throwable cause) {
        super(message, cause);
      }

      public AdminServerException(Throwable cause) {
        super(cause);
      }
    }
}
The AdminServer interface defines three methods and one class:
- The start method is used to start the AdminServer
- The shutdown method is used to close the AdminServer.
- The setZooKeeperServer method is used to set the ZooKeeperServer in the AdminServer.
- The AdminServerException class is used to define exceptions in the AdminServer.
Next, we'll analyze the JettyAdminServer class, starting with the constructor analysis. Let's first look at the no-argument constructor. The specific code is as follows:
public JettyAdminServer() throws AdminServerException {
  this(System.getProperty("zookeeper.admin.serverAddress", DEFAULT_ADDRESS),
          Integer.getInteger("zookeeper.admin.serverPort", DEFAULT_PORT),
          Integer.getInteger("zookeeper.admin.idleTimeout", DEFAULT_IDLE_TIMEOUT),
          System.getProperty("zookeeper.admin.commandURL", DEFAULT_COMMAND_URL));
}
In the above code, the core process is to read relevant data through environment variables and then construct the JettyAdminServer class. The specific information read is as follows:
- The variable address corresponds to the environment variable zookeeper.admin.serverAddress.
- The variable port corresponds to the environment variable zookeeper.admin.serverPort.
- The variable timeout corresponds to the environment variable zookeeper.admin.idleTimeout.
- The variable commandUrl corresponds to the environment variable zookeeper.admin.commandURL.
After understanding the no-argument constructor, we need to explain the parameterized constructor. The specific processing code is as follows:
public JettyAdminServer(String address, int port, int timeout, String commandUrl) {
  this.port = port;
  this.idleTimeout = timeout;
  this.commandUrl = commandUrl;
  this.address = address;

  server = new Server();
  ServerConnector connector = new ServerConnector(server);
  connector.setHost(address);
  connector.setPort(port);
  connector.setIdleTimeout(idleTimeout);
  server.addConnector(connector);

  ServletContextHandler context = new ServletContextHandler(ServletContextHandler.SESSIONS);
  context.setContextPath("/*");
  constrainTraceMethod(context);
  server.setHandler(context);

  context.addServlet(new ServletHolder(new CommandServlet()), commandUrl + "/*");
}
The core of the above code is to initialize the member variable server, which is the core class of Jetty. The most important part of the above code is the introduction of the CommandServlet class, which can handle command-line processing. It specifically supports the GET method, and the specific processing code is as follows:
protected void doGet(HttpServletRequest request, HttpServletResponse response)
        throws ServletException, IOException {
    // Capture the command name from the URL
    // Get the command
    String cmd = request.getPathInfo();
    // If the command is empty or the command is "/"
    if (cmd == null || cmd.equals("/")) {
        // No command specified, print links to all commands instead
        for (String link : commandLinks()) {
            response.getWriter().println(link);
            response.getWriter().println("<br/>");
        }
        return;
    }
    // Strip leading "/"
    // Remove the first slash symbol from the command, keeping the real command
    cmd = cmd.substring(1);

    // Extract keyword arguments to command from request parameters
    // Get parameters from the request
    @SuppressWarnings("unchecked")
    Map<String, String[]> parameterMap = request.getParameterMap();
    Map<String, String> kwargs = new HashMap<String, String>();
    for (Map.Entry<String, String[]> entry : parameterMap.entrySet()) {
        kwargs.put(entry.getKey(), entry.getValue()[0]);
    }

    // Run the command
    // Execute the command and get the command execution result
    CommandResponse cmdResponse = Commands.runCommand(cmd, zkServer, kwargs);

    // Format and print the output of the command
    // Write out the command execution result
    CommandOutputter outputter = new JsonOutputter();
    response.setStatus(HttpServletResponse.SC_OK);
    response.setContentType(outputter.getContentType());
    outputter.output(cmdResponse, response.getWriter());
}
The core processing flow in the above code is as follows:
- Get the path information from the request, which is the command to be executed later.
- If the command is empty or the command is a slash, write out the supported commands. The supported commands are initialized in the static method of org.apache.zookeeper.server.admin.Commands.
- Remove the first slash symbol from the command, keeping the real command.
- Get parameters from the request.
- Execute the command and get the command execution result.
- Write out the command execution result.
In the above processing flow, command objects are used to complete command processing. Let's explain the processing flow using the configuration command as an example. First, we need to clarify the specific value of the configuration command, which is in the constructor of the ConfCommand class. The specific code is as follows:
public ConfCommand() {
    super(Arrays.asList("configuration", "conf", "config"));
}
From the above code, we can see that the configuration command has three aliases: configuration, conf, and config. After understanding the command, we need to analyze the command processing. The entry method is Commands.runCommand, and the specific processing code is as follows:
public static CommandResponse runCommand(String cmdName,
                                          ZooKeeperServer zkServer,
                                          Map<String, String> kwargs) {
    if (!commands.containsKey(cmdName)) {
        return new CommandResponse(cmdName, "Unknown command: " + cmdName);
    }
    if (zkServer == null || !zkServer.isRunning()) {
        return new CommandResponse(cmdName,
                "This ZooKeeper instance is not currently serving requests");
    }
    return commands.get(cmdName).run(zkServer, kwargs);
}
The core processing flow in the above code is as follows:
- If the current command does not exist in the command collection, return unknown command information.
- If the ZK service does not exist, return the information that the ZooKeeper instance has not started.
- Get the command object from the command collection and execute it.
For the configuration command, the code for handling the response is as follows:
public CommandResponse run(ZooKeeperServer zkServer, Map<String, String> kwargs) {
    CommandResponse response = initializeResponse();
    response.putAll(zkServer.getConf().toMap());
    return response;
}
In the above code, it will get the configuration information of the ZooKeeper service and put it into the command response result.
ContainerManager Analysis
This section analyzes the ContainerManager class. The core of this class is to handle scheduled tasks, and the task details are to delete container nodes. The initialization method for the scheduled task is start, and the specific code is as follows:
public void start() {
  if (task.get() == null) {
      TimerTask timerTask = new TimerTask() {
          @Override
          public void run() {
              try {
                  checkContainers();
              } catch (InterruptedException e) {
                  Thread.currentThread().interrupt();
                  LOG.info("interrupted");
                  cancel();
              } catch (Throwable e) {
                  LOG.error("Error checking containers", e);
              }
          }
      };
      if (task.compareAndSet(null, timerTask)) {
          timer.scheduleAtFixedRate(timerTask, checkIntervalMs,
                  checkIntervalMs);
      }
  }
}
In the above code, it will get a task from the member variable task. If the task is empty, it will perform the following operations:
- Create a TimerTask class, with the core processing method being checkContainers.
- Add the TimerTask class created in step (1) to the member variable task, then start the scheduled task.
Next, we'll analyze the checkContainers method. The core of this method is to handle container deletion requests. The specific processing code is as follows:
public void checkContainers()
        throws InterruptedException {
    // Interval time
    long minIntervalMs = getMinIntervalMs();
    // Loop through container paths
    for (String containerPath : getCandidates()) {
        // Get current time
        long startMs = Time.currentElapsedTime();

        // Convert container path string to request
        ByteBuffer path = ByteBuffer.wrap(containerPath.getBytes());
        Request request = new Request(null, 0, 0,
                ZooDefs.OpCode.deleteContainer, path, null);
        try {
            LOG.info("Attempting to delete candidate container: {}",
                    containerPath);
            // Process the request
            requestProcessor.processRequest(request);
        } catch (Exception e) {
            LOG.error("Could not delete container: {}",
                    containerPath, e);
        }

        // Calculate time difference: current time - start time
        long elapsedMs = Time.currentElapsedTime() - startMs;
        // Interval time - time difference, if there's remaining time, the thread needs to wait
        long waitMs = minIntervalMs - elapsedMs;
        if (waitMs > 0) {
            Thread.sleep(waitMs);
        }
    }
}
The core processing flow in the above code is as follows:
- Get the time interval through the getMinIntervalMs method.
- Loop through the container path collection and perform the following processing for each individual container path:
- Get the current time, which means the start time.
- Convert the container path string to a request and pass this request to the request processor for processing.
- Calculate the time difference, calculation rule: current time - start time.
- If the result of time interval - time difference is greater than 0, then perform thread waiting.
After understanding the core processing flow of the scheduled task, we'll analyze how to get the container paths. The specific processing method is getCandidates, and the processing code is as follows:
protected Collection<String> getCandidates() {
    Set<String> candidates = new HashSet<String>();
    // Get the container path collection from the ZK database
    for (String containerPath : zkDb.getDataTree().getContainers()) {
        // Get the data node corresponding to the container path
        DataNode node = zkDb.getDataTree().getNode(containerPath);
        // Data node is not null
        // The cversion in the data node is greater than 0
        // The number of child nodes is 0
        if ((node != null) && (node.stat.getCversion() > 0) &&
                (node.getChildren().size() == 0)) {
            candidates.add(containerPath);
        }
    }

    // Get the expired path collection from the ZK database
    for (String ttlPath : zkDb.getDataTree().getTtls()) {
        // Get the data node corresponding to the expired path
        DataNode node = zkDb.getDataTree().getNode(ttlPath);
        // Data node is not null
        if (node != null) {
            // Get the collection of child node paths
            Set<String> children = node.getChildren();
            // The child node path collection is empty
            // The number of child node paths is 0
            if ((children == null) || (children.size() == 0)) {
                // EphemeralType is TTL
                if (EphemeralType.get(node.stat.getEphemeralOwner()) == EphemeralType.TTL) {
                    // Get expiration time
                    long ttl = EphemeralType.TTL.getValue(node.stat.getEphemeralOwner());
                    // Expiration time is not 0
                    // Node expiration time is greater than TTL time
                    if ((ttl != 0) && (getElapsed(node) > ttl)) {
                        candidates.add(ttlPath);
                    }
                }
            }
        }
    }
    return candidates;
}
The above code mainly processes two types of paths. The first type is data stored in the container path collection, and the second type is data stored in the expired path container. For the first type of data node, the cversion needs to be greater than zero and the number of child nodes needs to be 0 to be added to the result collection. For the second type of data node, the expiration time needs to be non-zero and the node expiration time needs to be greater than the TTL time (session expiration time) to be added to the result collection.
Summary
This chapter analyzes the ZooKeeperServerMain class in the ZooKeeper project, which is primarily used for standalone startup. We focus on examining its startup process, which involves the following key classes:
- ServerCnxnFactory: Used to produce ServerCnxn.
- AdminServer: Used for service management.
- ContainerManager: Used for container path management.
We also analyze the QuorumPeerMain class in the ZooKeeper project, which is used for distributed version startup. The analysis centers around the startup process of the QuorumPeerMain class, which includes the following main steps:
- Reading configuration information and converting it to QuorumPeerConfig.
- Creating a data directory cleaner to clean up the data log directory and snapshot directory.
- Loading the ZooKeeper database.
- Initiating the election process.